Goce Posted July 22, 2016 Author Report Share Posted July 22, 2016 Today i continue the work on the exhaust, first had to cut out one small piece of the spare tire support and cut and bend the other, then started by placing the last and smallest muffler and then position the drivers side exhaust tips, then tack welded them, then i started on the other side i avoid everything made of plastic or rubber, i install a flex joint to avoid cracking, and when i tried to remove it it would not come out, so i cut it in half and put in one more flange, so now is in 4 pieces, then i remove the back two pieces and welded them, is very dark underneath and the pictures look very bad, in real life looks much better, the rust is really surface rust and when i wash the engine bay, i'll wash the entire floor pan and then use acid to stop the rust and protect it, i'll also use the acid on the exhaust parts that have surface rust and protect them, more to come. Quote Link to comment Share on other sites More sharing options...
Bean Posted July 22, 2016 Report Share Posted July 22, 2016 Great progress so far Goce! Questions: Why are you only running one resonator on the passenger side? Is it to balance off the additional bends on the passenger side? I was thinking each side would sound different, but exhaust flow will pick the side with the least resistance, and that side will be the dominant side flow and sound wise. Curious if you thought about modifying the tunnel some more so that you could flip the center support upside down so that the driveshaft out of the transmission didn't have such sharp angles. I love the ingenuity that you've come up with - but I worry about the angles when applying all the power through that shaft. On a FWD car you're putting all the power into a singe wheel - be here you're putting it down into two wheels, and those wheels are getting the added benefit of weight transfer when you launch. Rabin Quote Link to comment Share on other sites More sharing options...
Goce Posted July 22, 2016 Author Report Share Posted July 22, 2016 Thanks Bean. First all the resonators are straight thru, to lower the back pressure, katalysator is not required im my country, so i'm not installing one, the main reason why i'm using only one on the back is space, the fuel fill is there, and everything there is plastic, and the muffler will melt everything, for the flow it should be the same because it has couple sharp bends. As for the tunnel there is way to much work for the drive shaft to go upwards, the fuel tank is the main limiting factor, is plastic and one piece, even 20mm up at the bearing touches it, i do not want to have a fuel tank in the trunk, even then that means cutting the entire floor pan and relocating the handbrake, so i'm willing to try it like this, if all else fails i'll do it. Quote Link to comment Share on other sites More sharing options...
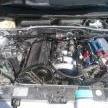
Goce Posted July 25, 2016 Author Report Share Posted July 25, 2016 It's been couple of days since my last update, while removing the middle section of the exhaust for welding the tack welds let go so i got tired of messing around underneath and decided to pull the engine out and start on the sheet metal, removing the engine is becoming more easy every time i do it. on the sheet metal i decided to start on the upper part and will work downwards, the first parts was easy, cut it straight and then cut and formed it as i wanted , tomorrow i plan to weld it in place, i also can weld the exhaust header, more to come Quote Link to comment Share on other sites More sharing options...
Goce Posted July 26, 2016 Author Report Share Posted July 26, 2016 Today i started by welding the two pieces together and grounding them smooth, then i ground the paint of the edges, and welded it in place, ground it smooth, after some seam seal and paint should look like factory. Then i started removing the heater matrix, the matrix pipes, i really wanted to keep the heater but simply no room, i'm keeping the blower, to be able to bring fresh air in the cabin, and then started breaking the heater box to make room for the tunnel to be build, more to come Quote Link to comment Share on other sites More sharing options...
Goce Posted July 31, 2016 Author Report Share Posted July 31, 2016 I Know it's been a long time since my last up date, last couple of weeks has been one step forward two steps back, thunderstorm knocked the power out, had a medical emergency, and after all that my brother's driving style( treading every car like a rental) couple that with the new found power from the rebuilt cylinder head it was too much for the clutch, and is back in the garage for a new valeo clutch set, by my reckoning the throw out bearing sized, and eat thru the pressure plate and destroyed the throw out bearing sleeve, more to come Quote Link to comment Share on other sites More sharing options...
Goce Posted August 3, 2016 Author Report Share Posted August 3, 2016 Finally the little 206 is out of the garage, it did not helped the the passenger side axle seal decide to leak after the test drive with the new clutch, so i had to replace it, now the garage is empty but a mess, i'll be back working on the sheet metal soon. Quote Link to comment Share on other sites More sharing options...
Goce Posted August 4, 2016 Author Report Share Posted August 4, 2016 Today i was finally able to work on the mi16 again, started by cutting even more metal out of the firewall, floor and subframe, my thoughts are if i have to change the engine or box i will have more room, therefore bigger tunnel, at first was going to making the tunnel round, but that means having to roll a big piece of 1.2mm steel, which is hard, then decide to make it square, started by making the dividing support, made it from 20x20x2 angle iron, which was quite expensive for what it was, place it in place, and started making the new firewall, used paper to make a template, transferred it to steel, cut it and use the press and bending jig to make the big bends, and bend the little edges by hand, and punch weld thru holes and started trimming it in place, now is roughly welded in i also made a little piece for where the A/C lines use to come out, there's more welding to be done, i had to stop, more to come Quote Link to comment Share on other sites More sharing options...
Goce Posted August 7, 2016 Author Report Share Posted August 7, 2016 You've heard when it rains it pours, well we had an enormous freak storm, it hit about 20 km from me, and is not over, we will have one more tonight and tomorrow, you can search:Macedonia storm 07 08 2016. Once things come back in normal i'll be back to work on the mi16. Quote Link to comment Share on other sites More sharing options...
Goce Posted August 9, 2016 Author Report Share Posted August 9, 2016 Things are settling down, the freak storm took 21 lives, i decided to work on the tunnel, started by bending all the edges, to be able to weld the tunnel, to the body, then i made a paper template, then cut it in steel and bent it, then i used couple of jack's to spread it in place and weld it in place, i caught the insolation on fire, almost burn the car down, got couple burn blister no my hands from putting it out, at the end used a CO2 bottle to extinguish it, no big deal, now i need to make one more piece and be done with the sheet metal. Quote Link to comment Share on other sites More sharing options...
Bean Posted August 9, 2016 Report Share Posted August 9, 2016 Holy cow - I googled the storm and it w a crazy! I hope your family and friends were safe, such a tragedy so many lives lost. On a happier note - Progress in car looks great. Rabin Quote Link to comment Share on other sites More sharing options...
Goce Posted August 9, 2016 Author Report Share Posted August 9, 2016 It is really a tragedy, such a storm my eyes have never seen, my family and friends are safe, my hart goes to those how lost their loved ones. Quote Link to comment Share on other sites More sharing options...
Goce Posted August 11, 2016 Author Report Share Posted August 11, 2016 Quick little update, the burn blister on my hands from putting the fire out opened up so i'm trying to stay out of the garage until they held, trying to avoid an skin infection, more to come. Quote Link to comment Share on other sites More sharing options...
Goce Posted August 13, 2016 Author Report Share Posted August 13, 2016 Today i continued working on the trans tunnel, started by cutting more metal out to make it square, starts with tin snips, to avoid sparks and starting another fire, then use hammer and dolly to bend the edges and punch holes for welding, then i made the metal piece, had to make it that shape because i want to install the original center console, and started to weld it in place, it fits nicely, i need to finish welding it, may not be the most beautiful but should do the job, more to come. Quote Link to comment Share on other sites More sharing options...
Goce Posted August 22, 2016 Author Report Share Posted August 22, 2016 It's over do for a update, i've been very busy with everyday stuff, i'll probably will be back to work on the car in a week time. Quote Link to comment Share on other sites More sharing options...
Goce Posted August 31, 2016 Author Report Share Posted August 31, 2016 Everyday jobs have keep me away from working on the mi16, also other home jobs made the garage a mess, so today i finally found some free time to clean the garage so i can resume work and get it finished. You can see there was no place to work or move around, the rear axles are for a another project that i need to finish before the winter begins, it includes peugeot xud9 engine, but i'm not sure if is it appropriate for this forum, in the meanwhile i've been sourcing more parts for this build like a bigger intercooler couple of fans, and other miscellaneous parts that i was missing, now that the garage is clean i can continue work on this project, more to come Quote Link to comment Share on other sites More sharing options...
Goce Posted September 1, 2016 Author Report Share Posted September 1, 2016 Today i put a solid day of welding on the car, started with the exhaust header, then turn on the engine mounts, i'm particularly proud of the gearbox mount, then moved to repair the rusted piece in the passenger wheel well, first cut and clean all the rust then made a paper template, then made it in steel, and then weld it, then started welding on the new passenger side subframe, then i weld the sway bar mount this took some time because all the sides had holes so i had to plate them, then i cut the front frame straight and plated it with 2mm steel same thickness as the frame, last thing i did is dropped the steering rack not to damage it, more to come. How says rust hasn't got a face. Quote Link to comment Share on other sites More sharing options...
Goce Posted September 8, 2016 Author Report Share Posted September 8, 2016 Today is independence day in my country so i had some time to spend in the garage, i put in about 8 hours of welding, first i finished the tunnel, i need to test fit the engine before i protect the new tunnel, then i started on the drivers side subframe, there was a lot of welding there, as a final job i decided that i should remove the extra steering shaft joint, to connect them i got out my spare steering shaft cut it to extend the one on the car, more to come Quote Link to comment Share on other sites More sharing options...
Goce Posted September 12, 2016 Author Report Share Posted September 12, 2016 It's been couple of days scene the last update, the lack of progress is down to the earthquakes that have been happening couple of times of day the big one yesterday with 5,3 on the richter scale, the car is still on the jack stands so i know my jack stands are good to have cope with 5.3 earthquake, more to come. Quote Link to comment Share on other sites More sharing options...
Goce Posted September 16, 2016 Author Report Share Posted September 16, 2016 Today i reinstall the engine in the engine bay, to check for clearance, it wasn't the smooth install, it fall from the engine crane when i bolted the gearbox mount, so when it drop it rip the mount, so i will order a new one, it clears everything and it has more than enough space all the way around, i'm thinking about installing one more engine roll stop on the passenger side, when the engine torques it won't move too much Quote Link to comment Share on other sites More sharing options...
Goce Posted September 18, 2016 Author Report Share Posted September 18, 2016 I've mentioned in a previous post that i've got a bigger intercooler for this build, i've been so busy i haven't even looked at it, to day i offer it to the car and is little too big, way to wide to run it behind the grill, and the shape of the mi16 bumper, the air grabber is low on the bumper, so i need to position it there, i would like to position the pipes in the upper position, because lines up perfectly in pipe diameter and location to the turbo, but hit the mainframe if i flip it it will fit with a little cutting, but i don't like the 50mm side to go to the intake, i'm wondering if i can make new aluminium tank for one side and weld it without destroying it from the heat. Quote Link to comment Share on other sites More sharing options...
Goce Posted September 19, 2016 Author Report Share Posted September 19, 2016 Today i put in couple of hours work on the mi16 one of the jobs left was to make a hole for the shifter and test fit it, started by installing the center console to find the center for the shifter, the console was hitting the back of the tunnel so i cut notch it and made a plate so close it, for now i just tack welded in place, then i started on the shifter hole, started with a hole saw but it was too small and wouldn't go thru, then i drilled the pilot hole to 32mm biggest notch on my step drill to use as guide, then marked it and drilled many small holes, then removed the mid and use a file and hammer and dolly to finish it, now it fits the saxo rubber gaiter, this should seal good, the next 3 hours pass to fast to photograph, i had to redo the entire shifter mechanism, because it was hitting the tunnel, i still have an hour work to finish the mechanism, and weld the end piece, more to come Quote Link to comment Share on other sites More sharing options...
SRDT Posted September 19, 2016 Report Share Posted September 19, 2016 You can TIG weld new aluminium end tanks on this kind of core, a friend does all his intercoolers like that. It's not easy to work on a used diesel core that was soaked in oil and the aluminium is quite thin so you will probably need some practice. Quote Link to comment Share on other sites More sharing options...
Goce Posted September 19, 2016 Author Report Share Posted September 19, 2016 SRDT i'm trying to avoid any more modification of parts, i'll modify the shell better then the part because if i need to replace it later i can buy a new part and just replace it, i was thinking to replace the intercooler driver side tank with the one in the first picture that will line up better with the inlet, but is 10 mm short and will not seal, i will install the front support and bumper first to see where i have space and how i can support it, thanks for the suggestions Quote Link to comment Share on other sites More sharing options...
Goce Posted October 1, 2016 Author Report Share Posted October 1, 2016 Update time, progress on the project is slow, had to prep the yard and house for winter, so my spare time is going there, don't worry i should be back working on it in couple of days, i have to protect the bear metal and then pressure wash the entire floor pan so i can undercoat it, thats has to happen quickly because winter is coming, more to come. Quote Link to comment Share on other sites More sharing options...

Recommended Posts
Join the conversation
You can post now and register later. If you have an account, sign in now to post with your account.