Goce Posted October 22, 2016 Author Report Share Posted October 22, 2016 Today the weather was good, little cloudy but nevertheless i pull the mi16x4 outside to pressure wash it, the washing took me couple of hours and i got pretty wet, i had to pressure wash the floor pen and engine bay twice with industrial strength degreaser to take most of the grime off, in the pictures you can see my driveway is little steep so the mi16x4 raised the driver side tire in the air, also the little kay car is now next to this project, i don't plan to drive it in the winter, this way should be out of the elements, when mi16x4 dries have to prep the shiny paint for repainting, the factory paint seems to be very thin, more to come Quote Link to comment Share on other sites More sharing options...
Goce Posted October 23, 2016 Author Report Share Posted October 23, 2016 The car is drying so i had some free time i went looking for a turbo badge, i did not want the generic china chrome crap, and after visiting couple of breakers i found this, it is from a peugeot 306 used to say turbo D, i cut the D now do i move all my badges and put it last, do i put it down below the body line or i replace X4 with the turbo? Quote Link to comment Share on other sites More sharing options...
SRDT Posted October 23, 2016 Report Share Posted October 23, 2016 The last one, 405 Mi16 Turbo. Quote Link to comment Share on other sites More sharing options...
Goce Posted October 24, 2016 Author Report Share Posted October 24, 2016 Today i decided to do little work on the throttle body, i had a hose nipple that i tap before for a plug, but decided to re drill and retap to be installed GM air temp sensor, in preparation for when i get a stand alone ecu, more to come. Quote Link to comment Share on other sites More sharing options...
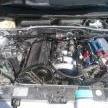
Goce Posted October 24, 2016 Author Report Share Posted October 24, 2016 i've got a question, i want to reuse my LPG Propane system, but i don't like the location where the shop that install it place the inlet nipples they drill and tap them from the top and notch the head opening, i like to place them underneath the inlet manifold, my question is how it will affect the airflow, the nipples are tapered, so i can angle them like in the photo, any opinion. Quote Link to comment Share on other sites More sharing options...
SRDT Posted October 24, 2016 Report Share Posted October 24, 2016 No idea for the LPG but the post about the TB reminds me that if you want to run a turbo engine with the stock AFM you will probably need to clock the spring inside so that the flap need more airflow to fully open. Peugeot did that on the 309 Turbo Trophy, 7 clicks to go from 130 to 180+ hp. Quote Link to comment Share on other sites More sharing options...
Bean Posted October 25, 2016 Report Share Posted October 25, 2016 Is it a dual fuel set up as well? Angling into the runner from underneath should be fine if it's fairly close to the port. Only real worry woulf be reversion of the gas out of the intake runner but that's not likely. Also guessing LPG placement is not nearly as critical as fuel injectors since where they spray is very important for proper atomization and LPG is already atomized. Rabin Quote Link to comment Share on other sites More sharing options...
Goce Posted October 25, 2016 Author Report Share Posted October 25, 2016 Yes is a dual fuel system, it has its own piggy back ecu temp sensor, ignition signal and is mappable fuel only, with the jets in it makes the same power like on gasoline, only idle smoother, ther are settings whare it can deliver lpg+gasoline, i was thinking to find standalone engine management that can run 8 injectors and i can run race fuel when i'm in boost and lpg off boost, but all the standalone cost more than i make in a month. Quote Link to comment Share on other sites More sharing options...
Bean Posted October 25, 2016 Report Share Posted October 25, 2016 I assume LPG is the cheapest? Can it flow enough for power goals? If so I'd run it on LPG the whole time with regular fuel as emergency back up. LPG has a very high octane rating and it burns clean - so much easier to run higher boost with no issues. Problem is it's a lot lower BTU so it needs to flow a lot of LPG to make power. If you ran it dual fuel with regular fuel then LPG could be used on boost only since the higher octane will quell detonation. This assumes LPG there has the properties as here. Rabin Quote Link to comment Share on other sites More sharing options...
Goce Posted October 25, 2016 Author Report Share Posted October 25, 2016 LPG is half the price of gasoline and is 104-110 octane rating, as for gasoline we have the most expensive one in europe, the quality is good and we have 100 octane on almost every gas station, my lpg system is rated for 160kw, which is lower than i like to achieve, for starters i would like to run both to support the airflow, if the both pair injectors can't keep up i'll upgrade to bigger fuel injectors, i like the ones i've got from the GM V6. Quote Link to comment Share on other sites More sharing options...
Goce Posted October 25, 2016 Author Report Share Posted October 25, 2016 Today i spend about 10 hour working, started by jacking the car up on jack stands, then i took all wheels off, then i wrapped the k car in plastic to avoid ruining the paint, then i wrapped the mi16x4 also, then started making everything, i got bored with the masking, so i took the front suspension off to avoid overspray now is detail, next in line is to make mounts for the expansion tank, finish masking and i found couple of rusty spots in the wheel arches, they need some attention, more to come. Quote Link to comment Share on other sites More sharing options...
Goce Posted October 27, 2016 Author Report Share Posted October 27, 2016 Today the weather was nice so i decided to visit couple car breakers and found recently crash damaged, 405 series 1 probably 91 or 92, it was pretty gone, so i only took the better pieces, took the stering wheel it is lether, unfortunately it has two rips and the center cap is missing, but it can be recovered with new leather, also got the the shifter mehanizam this one has the cable for reverse so if i ever want to do a 6 speed swap i'll have it, also took all the door handles, fuel door, couple of pieces of trim, all in all good trip. Quote Link to comment Share on other sites More sharing options...
Goce Posted October 28, 2016 Author Report Share Posted October 28, 2016 Today i started with cutting little piece of metal to make room for the coolant expansion tank, then drilled two holes for the mounting pins of the tank, this completes mounting the tank, then started sanding every painted piece, when my hands started to hurt, applied the undercoating, did two coats on the new metal and frame rails, next i need to finish sending and masking, painting should be easy, more to come. Quote Link to comment Share on other sites More sharing options...
Goce Posted October 29, 2016 Author Report Share Posted October 29, 2016 Today was a long day in the garage, all the masking sanding left me with hurting hands and back, and the paint fumes gave me a good headache, the paint it shelf doesn't stink that much but the clearcoat is the worst, you can see in the pictures i painted everything in the engine bay that was black, and the wheel arches, now i can begin the reconstruction, more to come. Quote Link to comment Share on other sites More sharing options...
Goce Posted October 30, 2016 Author Report Share Posted October 30, 2016 Today i remove the masking and laid the cables where they need to go, then started on mounting the gauges, made a holder out of a pipe, got a new speaker grill to which i plan to mount them, the new paint is dry but still soft for the next couple of days plan to do other small jobs to leave it time to dry, more to come Quote Link to comment Share on other sites More sharing options...
Bean Posted October 30, 2016 Report Share Posted October 30, 2016 Great progress lately Goce! Looks really good. Rabin Quote Link to comment Share on other sites More sharing options...
Goce Posted October 31, 2016 Author Report Share Posted October 31, 2016 Today i continue with the gauges did the initial wiring with different color wires to be easy to connect later sorry no picture, then i started with the wiring for the cooling fans, had to mount the fan motors, changed one of them because it was very nosy, had to run a tap thru the fan mount treads, they had some rust in them, put some grease to avoid any rust in the future, i looked at the schematics to understand the how they work, so using a multimeter was easy to locate the wires, also changed the low coolant sensor plug, i'm using newer sensor located in the coolant expansion tank, more to come. Quote Link to comment Share on other sites More sharing options...
Goce Posted November 1, 2016 Author Report Share Posted November 1, 2016 Well i'm at that stage more parts i put on the car better it looks, looks more like a car, that said every part that gets installed needs to be cleaned checked if needed repaired, so today started with engine mounts, then i mounted the coolant expansion tank and the power steering tank, both are cleaned inside and out and fit nicely, next in line was the windscreen wiper mechanism and a few little things, the other parts steel need to be cleaned, then i moved on to the engine took the rocker cover off and separated the gearbox, the plan is to paint both of them silver and then to do hydrographics on the rocker cover only, this is the first time i've taken off the cover and it is pretty clean, by the looks the head has never been off the block and the camshafts and lifters are like new, now there is a lot of cleaning in front of me, more to come. Quote Link to comment Share on other sites More sharing options...
Goce Posted November 2, 2016 Author Report Share Posted November 2, 2016 Today started by mounting the ECU box, abs ecu, wiper motor cover, washer bottle, had to install new hose for the washers the old one was hard dirty ugly the new one is silicone and is the same color as the old one, after that i installed the the grill under the windscreen and wipers, then i got the front suspension install also mounted the series 2 shock mount covers and wheel arches, then i wash the cam cover, most of the paint came off with just degreaser and power wash, but there are some stubborn spots, for them i use paint stripper and some of them steel did not came off, the magnesium cam cover is an new territory for me, can some one tell me if i need some kind of adhesion primer and could i use normal car primers and filler? Quote Link to comment Share on other sites More sharing options...
Goce Posted November 3, 2016 Author Report Share Posted November 3, 2016 Today i continued with the cleaning of the valve cover, decided to sand as much of the oxidation that i can, so i used a DA sander on the bigger spots, a file on the fins, and sandpaper on the round sides, then i applied based sealer on both sides that should stop any more oxidation, then i masked the fins to avoid getting high build primer in between, then i applied 4 coats of high build primer to cover all the holes, then i turn my attention to the gearbox, first i washed it with gasoline then i smooth couple of spots and applied adhesion promoter and painted it silver, after the paint,i gave it a quick clearcoat to seal it, then i turn my attention to the exhaust manifold, first i ground down couple of welds, then i sprayed anti rust acid on it after it finish derusting, i painted it silver with heat resistant paint, i've noticed very little activity from another members of this forum, i know that sema 2016 is on now but what's up. Quote Link to comment Share on other sites More sharing options...
Bean Posted November 3, 2016 Report Share Posted November 3, 2016 I am on the cusp of posting a lot more - but I zinged my finger with a flapper disk when I was cleaning up the casting marks on my Vovlo's exhaust manifold and that put an end to progress for a bit while it heals. Your progress has been unrelenting and it really is inspiring for me to finally make time for my projects. First ones for me are much overdue maintenance on my V70R's, and once they're good I'll tie into my 86' TD wagon. Quote Link to comment Share on other sites More sharing options...
Goce Posted November 3, 2016 Author Report Share Posted November 3, 2016 Sorry to hear about your finger i know how it feels, i have dozens of scars on my hands from power tools, take your time allow enough time for it to hail to avoid an infection. Quote Link to comment Share on other sites More sharing options...
Goce Posted November 4, 2016 Author Report Share Posted November 4, 2016 Today i continue with the valve cover, yesterday i put it in high build primer and late last night i wet sanded it, today i try hydrographics, but i was getting very bad results so in the interest of time i simply painted flat black and then used a metal fail to make the fins and numbers sine, it's not perfect but its way better than before, in the meanwhile when the paint was drying, i change the rubber o ring on the camshafts spray bars, which do not have holes for the camshafts, they only supply oil in the camshaft journals, i had only one voltaren o ring in that size so i used it on the supply others got rubber ones, the old ones are rock solid and crumbled, and i soaked the spark plug seals in some brake fluid they are not rock solid but can be softer, and this should soften them, then i masked the gauge pot that i made on top of the speaker grill, they fit better but the paint was still soft to fit it properly in the picture, i still have couple of things to do before the engine can be installed in the car for good, more to come. Quote Link to comment Share on other sites More sharing options...
imaS Posted November 4, 2016 Report Share Posted November 4, 2016 I did the same with the valve cover. Raised parts did look nice and shiny for a little while but unfortunately they will fade out quite soon when the car gets driven. I wonder if there is any easy method to keep the shine. Quote Link to comment Share on other sites More sharing options...
Goce Posted November 4, 2016 Author Report Share Posted November 4, 2016 i was thinking about mixing lite automotive clearcoat and carefully paint it on, that way is sealed from the elements and should withstand the temperatures. Quote Link to comment Share on other sites More sharing options...

Recommended Posts
Join the conversation
You can post now and register later. If you have an account, sign in now to post with your account.