tulaweb Posted December 9, 2013 Report Share Posted December 9, 2013 One of my Rear Suspension Arms seems to be about to give out. Back when one of them broke on what is now my parts car, Aron gave me his old ones when he replaced his. I retired that car before installing Aron's Suspension Arms. Those are in much better shape than mine. I've never completely removed them before. I have previously removed the bolts at the front pivot points on the other car, so I think I can get them OK. Can someone run through the procedure with me for the rest of it? Specifically how do I get it off the axle? Do I take that out at the wheel end or the differential end? Do I need any seals, axle nuts or any other parts before I start? Do I need anything to compress or restrain the spring or is that fully extended with the wheel off the ground? Any other gotchas I should be aware of? Quote Link to comment Share on other sites More sharing options...
Bean Posted December 10, 2013 Report Share Posted December 10, 2013 Remove the brake calipers. There are four Allen socket head bolts (accessed by the largest hole in the hub), and once they're removed, the bearing carrier complete with disk and driveshaft should come off as a unit. (Driveshaft pops out easily with a lever between it and the diff) You will need to free up the brake line, and the sway bar, but other than that, the arm should be ready to come out once you remove the bottom shock mount. I'm not exactly sure how much spring tension is left, so I would ensure you have the arm supported with a jack you can lower once the shock is undone. I've never actually just replaced arms as I've just replaced both arms as attached to the cross member. As for things to do: Repack the rear wheel bearings, and there is an inner seal for each bearing. Diff output seals could be done as well. Rule of thumb for me is to look at the seal lip. If there is a nice sharp rubber edge to the seal they are still good. If the edge is worn smooth then you should replace. You might also want to remove the diff and lube the drive shaft splines. Lots of things can be done to the brakes as well, but I left all that as they're readily accessible Rabin Quote Link to comment Share on other sites More sharing options...
andrethx Posted December 10, 2013 Report Share Posted December 10, 2013 before you put the new arms on, you should consider protecting them from future rust. as we've discussed before, the rear suspension arms on the 505 are made from two metal stampings welded together, and they tend to rust on this seam or around the mount for the shocks & springs. two ways to go -- have them powder coated, which is what i'm planning to do with mine; around here, that will cost around US$200 but they do all of the work, including the initial sandblasting. the other way to do it would be to strip them yourself (either chemically, with a wire brush or by having them sandblasted -- around US$35 here for the latter), then paint them with some sort of undercoating paint, e.g., por15, kbs coatings, etc. andré Quote Link to comment Share on other sites More sharing options...
Bean Posted December 10, 2013 Report Share Posted December 10, 2013 I echo Andre's suggestion, but one thing to consider with powder coating is that you can't really touch it up once it chips like you can with the paint products. Another issue I found was that powder doesn't do well covering nooks and crannies, or very rough sections. I had my grill powder coated and there were areas that didn't get done where the mesh met the metal tubes that rust could easily start. I treated the areas with corrosion 3000 and its been good so far, but I've also gotten chips in it now so POR-15 may have been a better choice. Rabin Quote Link to comment Share on other sites More sharing options...
tulaweb Posted December 10, 2013 Author Report Share Posted December 10, 2013 I'm going to need to find another left one. The one Aron gave me has a pretty sizable hole in the top,where it apparently rubbed the finish off on the rebound block, so I'm putting that on, just to temporarily hold me over, and since that's the one that I urgently need, I think I'm going to put that one on as is. The right side one I got from Aron is in pretty good shape, so my plan was to use a wire brush attachment on my grinder to clean it up, then treat the seams with SEM Rust-Mort then treat the rest of the bare metal with Eastwood Fast Etch, prime it with 2K epoxy primer and top coat with Eastwood 2K Ceramic Chassis Black I'll then do the interior with Eastwood Internal Frame Coating. I'm shooting for a combination of stopping rust and a chip resistant coating. I haven't called him yet but I was thinking maybe Brian Holm might have one in reasonably good shape. If so I will be not too far from him in late December or early January and I could save some substantial shipping costs by picking it up. Then once I get warm weather again, I can execute my plan above and put them both in. Quote Link to comment Share on other sites More sharing options...
andrethx Posted December 10, 2013 Report Share Posted December 10, 2013 that sounds like a good plan, dave. also, you might want to call ukit here in the LA area for that arm. they tend to survive better out here.... when i bought my dash from brian holm, he said that dashes tend to move west, and rear suspension arms tend to move east... andré Quote Link to comment Share on other sites More sharing options...
tulaweb Posted December 10, 2013 Author Report Share Posted December 10, 2013 If Brian doesn't have one in good shape I'll look west. Arun gave me his old ones for nothing but the shipping alone was $60. Thats OK if I have to do that for the other one, but if I can get it without having to ship it cross country, that would be good. Quote Link to comment Share on other sites More sharing options...
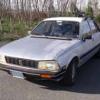
tulaweb Posted December 11, 2013 Author Report Share Posted December 11, 2013 I took the car to a local place where I could inspect it on a lift and as I thought the left rear suspention arm has failed. It has a split where the red line is in the illustration. Quote Link to comment Share on other sites More sharing options...
tulaweb Posted December 12, 2013 Author Report Share Posted December 12, 2013 As for things to do:Repack the rear wheel bearings, and there is an inner seal for each bearing. Diff output seals could be done as well. Rule of thumb for me is to look at the seal lip. If there is a nice sharp rubber edge to the seal they are still good. If the edge is worn smooth then you should replace. You might also want to remove the diff and lube the drive shaft splines. Lots of things can be done to the brakes as well, but I left all that as they're readily accessible Just so I'm sure I understand, these are things that might make sense to do while I'm in there? I don't need to open up the wheel bearings correct? If I need the bearing seal or something, I'm going to have to send away for that before I start. I have to do this out doors in a parking lot, and we're expecting snow on Saturday. I can't leave this apart for days. The shop where I took it today, to look at it, shows the time for this as 4.5 hours. It doesn't seem like it should take that long in a properly equipped shop, and he didn't see why it should either. It may take me that long in the parking lot, but I don't want to extend it any further than I have to. I can reach the parking lot with the air hose so I hope with the impact wrench I should be able to get everything apart OK. Quote Link to comment Share on other sites More sharing options...
Bean Posted December 12, 2013 Report Share Posted December 12, 2013 Sorry Dave, that was the "preventative - maintain/fix/replace everything I'm touching" list... For a parking lot R&R, you don't even have to separate the axle shaft from the bearing carrier. Once that is out of the way you can free up the arm from the brake lines, sway bar link, and rear shock. Under the rear seat bottom are the three nuts on each side that hold the crossmember up, so you may want to undo them and lower the cross member if access to the pivot bolts suck, otherwise it should be straight forward. Rabin Quote Link to comment Share on other sites More sharing options...
tulaweb Posted December 12, 2013 Author Report Share Posted December 12, 2013 Thanks that's what I thought you meant but I wanted to be sure I understood. I was able to get the pivot bolts out in the other car without lowering the crossmember. It was a little bit of a knuckle buster, as I recall, but I did it with hand tools, so I assume I'll be able to get this one. Once I have a better arm for this side and I've refinished it and the one I have for the other side, presumably after winter has passed, then I can do a more planned project. I may take down the crossmember then, just to do some anti rust work, but for now, I just want to get it back in working order. Quote Link to comment Share on other sites More sharing options...
tulaweb Posted December 12, 2013 Author Report Share Posted December 12, 2013 So far so good. I'm coming in to warm up for a few minutes. I've got the caliper off. Removed the two forward pivot bolts and the sway bar link. So I've still got the 4 bolts holding it to the wheel, the bottom of the shock and the brake lines. The sun is out and it's 31o F (balmy between 0 and -1C for you Canadians) so it's not to bad out there but a few degrees warmer would be nice. Quote Link to comment Share on other sites More sharing options...
tulaweb Posted December 12, 2013 Author Report Share Posted December 12, 2013 The 4 bolts are off. Still have to free up the Emergency brake cable and disconnect the bottom of the shock. It seems like I've got to remove the rubber boots on the axle, or at least at the differential. Do I need to know anything about that? I'm going back to take another look. Quote Link to comment Share on other sites More sharing options...
Bean Posted December 12, 2013 Report Share Posted December 12, 2013 Nope - axle just pops out of the diff. There's a spring clip on the end, so just use a pry bar to pop them out. Slide out carefully so the seal doesn't get banged when you slide it out. Axle stays bolted to the disk/bearing carrier so its a bit awkward, and the axle has to come out the trailing arm hole so just be careful of the boots. Rabin Quote Link to comment Share on other sites More sharing options...
tulaweb Posted December 12, 2013 Author Report Share Posted December 12, 2013 Never mind about the boot. I just had to jack up the arm a bit. Hanging all the way down it was hitting the boot so the axle couldn't come all the way out. So Now still trying to get the Emergency brake cable free and the brake line where it attaches to the arm, but I can't see what's holding it in place now. All the bolts are out. It seems like the arm should just drop out now but it won't come loose. Quote Link to comment Share on other sites More sharing options...
Bean Posted December 12, 2013 Report Share Posted December 12, 2013 Pretty sure there's a clip that holds the rubber line end onto the tab - similar to how they did front brake hoses. If that's all free then rust is holding it together. Pivots will likely need to get pried out, as the metal sleeves inside the bushings will be rusted to the bracket at the very least. Once loose the brake cable should just feed out of the holes. Rabin Quote Link to comment Share on other sites More sharing options...
tulaweb Posted December 12, 2013 Author Report Share Posted December 12, 2013 I've got the brake line off The pivots seem to move around OK. It seems to be connected at the spring. The bolt at the bottom of the shock is out. The sway bar link is unbolted top and bottom. I would think a good swift kick and it would just fall down. Maybe I need to take a pry bar to the bottom of the spring? The sun's going down so I'm coming in to warm up more frequently now. Quote Link to comment Share on other sites More sharing options...
tulaweb Posted December 12, 2013 Author Report Share Posted December 12, 2013 Once loose the brake cable should just feed out of the holes. "Once loose" is the operative term :-) Quote Link to comment Share on other sites More sharing options...
tulaweb Posted December 12, 2013 Author Report Share Posted December 12, 2013 What was keeping the arm from dropping out was the bushing at the bottom of the shock. It would not go straight up through the hole. I pulled it down, turned it 90o and it goes through no problem. Still working on the emergency brake cable. Of course I forgot I have the factory manuals for the brakes, and for the Drive line, front and rear axle, so now that it's almost out, I guess I'll look at the book. Quote Link to comment Share on other sites More sharing options...
tulaweb Posted December 12, 2013 Author Report Share Posted December 12, 2013 How the hell do you get that Emergency Brake cable off the caliper?!! I've changed the calipers before so I know I must have done it, but clearly there is some trick to it that I'm not remembering. The manual just says disconnect it. No further detail. Quote Link to comment Share on other sites More sharing options...
tulaweb Posted December 12, 2013 Author Report Share Posted December 12, 2013 Got it!!! OK so the old one's out, now to start reassembly. I'm not going to finish tonight, but hopefully I can get the new one in position. Quote Link to comment Share on other sites More sharing options...
Bean Posted December 13, 2013 Report Share Posted December 13, 2013 Reinstall almost always goes faster than removal... Just like if you had to do the other side it would likely take 1/2 to 1/3 the time... Good luck on reinstall. Rabin Quote Link to comment Share on other sites More sharing options...
tulaweb Posted December 13, 2013 Author Report Share Posted December 13, 2013 Well that's all the fun I can stand for one day! I got the arm back in. Got the bolts in place but not tightened. Got the axle/wheel assembly back in with the bolts somewhat tightened but I'll take a torque wrench to them tomorrow. So tomorrow I've got to tighten everything up and put the brakes back together and that should be it.I sure am glad I didn't have to take that apart without an impact wrench! BTW it's 10:00PM my time. Quote Link to comment Share on other sites More sharing options...
Bean Posted December 13, 2013 Report Share Posted December 13, 2013 Holy crap Dave - you're hardcore! Good job on sticking with it and getting it back in - extra points for in the dark, outside, and in December. It's funny, but it's funny how Peugeot guys tend to have stories like this... Rabin Quote Link to comment Share on other sites More sharing options...
andrethx Posted December 13, 2013 Report Share Posted December 13, 2013 good job, dave! when you get a chance, please post pics of the deceased suspension arm... andré Quote Link to comment Share on other sites More sharing options...

Recommended Posts
Join the conversation
You can post now and register later. If you have an account, sign in now to post with your account.