trymes
-
Posts
89 -
Joined
-
Last visited
Content Type
Profiles
Forums
Gallery
Events
Collections
Everything posted by trymes
-
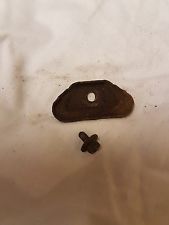
Thanks, Goce, I'll do that. I found this photo online, is this what I am looking for?
-

505 Turbo - won't exceed 2750-3000 RPM
trymes replied to trymes's topic in Peugeot 50x Series discussion
The actuator signal comes directly from the turbo compressor, itself. It's just a 8" hose or so, wrapped around the intake accordion hose and back into the actuator. The gauge is teed into the line that goes from the intake manifold to the MAF sensor under the air filter. I used fuel line with nylon reinforcement, so I don't think that's the issue. Mamba has been helpful with support, but the time difference generally means I get a response the next morning at 3:45AM. I need to confirm that the rod is exiting the actuator without being shoved to one side, plus open the actuator and confirm sufficient lubricant on the piston. I'd say that the diaphragm type would be a better fit, despite the need to periodically replace diaphragms (every 20-30 years?). Lastly, yes, the actuator is a single-port pressure actuator. The spikes are weird, and it's almost like the actuator won't move unless you really shock it, or something, so I will take it out and inspect it and the installation. I'll figure it out. Tom PS: The newfound oil leaks are what's really annoying me right now. She's marking her territory even worse than my British cars! -
Thanks, that would be helpful. I knew it had to be simple, but I wasn't certain, and if the original part is around, all the better. Is the fastener odd-ball? It looks like it at first glance, but I haven't had a chance to look closely. Tom PS: No need to get photos of the turbo, I'm far more familiar with it than I ever wanted to be at this point!
-
It is working well, but I need to modify the breather hoses so I can adjust the accordion to a more natural bend. If I leave it the way it is currently installed, I'm worried it will shorten its lifespan (not drastically, but still).
-
Yes, thanks for asking. It was an issue that the seller had disclosed before I had purchased the car, but he brought it to a shop and they could not replicate it. I also have not had it happen, so I have no idea what the issue was, if there ever was one, and if maybe the seller was confusing the wastegate issue with this (how?).
-
As I mentioned in another thread, I have a bit of a weird issue. Namely, if I turn on my headlights and depress the brake pedal, the battery icon in the instrument panel glows dimly. If I turn on the turn signal while still depressing the brake pedal, it then glows dimly, brighter, dimly, brighter, etc in time with the turn signal. Any thoughts on what might cause this? My first instinct is to check the grounds in the lights, but not because that makes sense, just because it's the first thing I thought of. Perhaps the bulbs are of the wrong type? Any help would be appreciated. Tom
-
I have been editing the original post, but I thought I would keep adding items as they arise. I noticed today while working on the car that the secondary piston on the steering rack (what is that called?) seems to be missing a bushing where it attaches. I'll reach out to Brian H. to see if he knows what I mean. I think I also need to source a different rack boot for the RH side from him, as the one on the car has to wide-mouth openings and the one he provided looks just like the LH side: One wide-mouth opening, one small. I also cinched down the valve cover nuts a tiny bit (being careful not to distort the cover), as I had what seemed to be a pretty healthy oil leak down the front of the engine. My hunch is that I have a leak somewhere else, too, but time will tell if this leak diminishes. I also noticed that the cooling system was not building pressure, and it looked like it could use a good flush, so I drained it out, cleaned the overflow tank up a bit and re-filled it. I then fit a replacement cap I had and it started building pressure. Further inspection revealed two caps with properly functioning relief valves, but the original had a bad gasket. Unfortunately, since the system is now pressurized, it seems to have caused a slow leak at the "Do Not Open - Ne Pas Ouvrir" cap on the LH top of the radiator. It looks to me that the gasket in that is also bad (soft, cracked in the middle, and deformed where it meets the plastic radiator tank). I suppose I can either cut a new rubber sheet to replace the existing one, or perhaps find a good used or NOS cap. Lastly, I noticed that the charge light (battery icon) on the instrument panel does come on dimly when I have the lights on, but only when I have the brakes (and brake lights) on. I had initially thought that the light went off when I increased engine speed, but it is actually the brakes that cause the issue. The light will even glow dimly when the engine is revved up if I have the brakes on. I have started another thread on this topic. Lastly, I noticed a loose wire under the transmission. It looks like it might have been attached to what looks like a sensor in front of the pan that someone has stuffed some Silicone in. It drives fine for now, so hopefully it's not urgent.
-
505 Turbo - won't exceed 2750-3000 RPM
trymes replied to trymes's topic in Peugeot 50x Series discussion
Ah, the saga continues, but in a positive direction. To answer your question, Rabin, the unit from Brian did not fit the OEM turnbuckle, and it opened at a VERY low PSI, meaning I would likely never have built any boost. It did, however, donate its bracket to the effort, which I installed while I had everything apart. Since then, I ordered up the Mamba actuator, as it looked like it would fit, seemed well-designed, and I found it for somewhat less money on eBay (from the manufacturer). It arrived the other day, and I got in into the car with minimal fuss, and the car is actually driving (mostly) normally! Instead of bucking and kicking when the tachometer hits 3,000 RPM, it continues on nicely, with quite a bit of power. It did feel pretty strong, and on the way home I noticed that it would overboost and cut fuel if I put my foot in it at highway speed in fourth gear (automatic transmission). I knew that there would be some trial and error with the adjustable actuator, so I had already ordered up a combination vacuum/boost gauge. I wanted to make sure that I hadn't pre-loaded the actuator too much, and that it wasn't running with too much boost. To this end, I temporarily plumbed it in so I could see exactly what is going on. The stock gauge works, but seems more of an approximation than a true reading, there are no numbers, it moves slowly, and it does not peg to the red when in overboost, so I'm not certain how accurate it is. My plan is to use it to get things dialed in and then put it in the tool chest for future use if ever needed. Before I did this, I reduced the pre-load on the actuator for good measure. After teeing the gauge into the system, I went for a drive, and the gauge reads a steady vacuum at idle, and spools into the boost side steadily as the RPMs increase. Right around the 3,000 RPM range, you can hear the turbo really start to spool up in earnest, and the boost gauge would spike upwards to around 13-14 PSI, and then drop quickly to around 6 PSI. This is independent of the transmission shifting: the boost builds rapidly to 13-14, then drops quickly to a steady 6-7 PSI. On the highway, it will still overboost if I hit the throttle at speed (65-70 MPH) just enough that the transmission doesn't kick down into 3rd gear. The gauge shows a steady, quick build up in boost right up to 14-15PSI and the fuel is cut off. If I really mat the pedal and force the transmission to kickdown, it does not overboost, it jumps a bit and settles into the 6-7PSI. After this test, I was confused, but I figured I would reduce the pre-load even more, just for the purposes of experimentation. The result was a reduction in both of the numbers above, but still the same behavior. Now it is spiking to 11-12 PSI and running at 5-6 PSI steady after that. It will still overboost on the highway in 4th gear. I'm at a loss to explain this behavior, but my first guess would be to swap springs in the actuator to a softer spring, and see what happens. Perhaps a softer spring combined with more pre-load will result in more stable behavior? I'm grasping at straws at this point, but who knows, maybe it's worth a try, and with the modified mounting bracket, the actuator isn't all that difficult to remove. Is anyone here able to provide some insight on what is causing these two behaviors, and what "Normal" would look like? It's not too late to order up the eBay actuator from Jesse, but that seems silly. -
505 Turbo - won't exceed 2750-3000 RPM
trymes replied to trymes's topic in Peugeot 50x Series discussion
Just to add more details for anyone searching the archives in the future: I found a link to a "rebuilt" actuator on eBay here. It is being offered by seller dubarr, who has a bunch of 505 items, it seems. Is that anyone known around here? I asked a question about how they are rebuilt, as there doesn't appear to be any evidence that the canister was opened in the photos, so I'm curious what was done. EDIT: Seller has responded that the item is rebuilt by GB Remanufacturing. -
My '86 505 Turbo-Gas sedan is missing its battery hold-down, so the battery is wandering around the engine bay a bit. Does anyone have one that they could sell me? Tom
-
As part of the saga of sorting out issues with my newly acquired Gas Turbo car, I spoke with Brian Holm to source a new Accordion tube to connect the air filter and the turbo inlet. While he did not have the right part for a gasoline-powered car, he suggested that I could modify the part from a diesel to fit. After getting the part, I was easily able to drill out the blank boss where the inlet from the charcoal canister connects and transfer the nipple to which it connects. Unfortunately, after having put the part in the car, it appears to me that perhaps it is rotated differently? If I rotate the accordion such that it most easily fits (with the least twisting and turning), the hose from the valve cover does not reach. If I rotate it such that the hose from the valve cover reaches, I have to contort the accordion in such a way that it seems wrong to me, and perhaps likely to shorten its life. Of course, I can just extend the hose from the valve cover breather, but I thought I would ask here if anyone knows whether the Diesel and Gasoline turbo accordion tubes differ in any way, other than the omission of the charcoal canister connection on the Diesel part. Tom
-
505 Turbo - won't exceed 2750-3000 RPM
trymes replied to trymes's topic in Peugeot 50x Series discussion
Thanks for that. So, my '86 sedan should be running 9 psi once everything is sorted? -
505 Turbo - won't exceed 2750-3000 RPM
trymes replied to trymes's topic in Peugeot 50x Series discussion
Maybe? It is for a FAR lower pressure. I hooked a bike pump up to it and it began to open almost instantly. I'd wager 1-3 PSI? The thread on the rod was different, too, so I don't know if that rules anything in or out. How can I tell which engine I have? Is it a model year or model name thing? -
505 Turbo - won't exceed 2750-3000 RPM
trymes replied to trymes's topic in Peugeot 50x Series discussion
Thanks, Rabin. 9 psi? Here I was aiming for 12, as I thought that was stock, and I have no interest in pushing this car until I have confirmation that it doesn't have other, hidden issues. Also, I know I don't have a N9TEA, but how would I recognize one if I did? I have reached out to the two vendors of the new actuators, but they only do e-mail contact, no telephone. I think that one (Mamba) is in Taiwan and the other (Merkur Driver) is a part-time vendor. Based on the 9 PSI number, though, it sounds like the Merkur piece will likely be set too high. What are your thoughts on this image and which of the listed springs would be the best place to start (I have already ordered a cheap vacuum/boost gauge for testing and to confirm reality matches expectations? My guess is green. -
505 Turbo - won't exceed 2750-3000 RPM
trymes replied to trymes's topic in Peugeot 50x Series discussion
Thanks, Goce, I'm sure that you're right. Having said that, Peugeots in junkyards here are likely to be nearly non-existent. I'm sure that I could locate one through the community, but I'm not sure I'd want to invest at least two hours of my time into procuring a part with 30 year-old rubber. I'd feel really dumb if it were to fail relatively soon, so I'd say that a new unit would be cheap insurance. -
505 Turbo - won't exceed 2750-3000 RPM
trymes replied to trymes's topic in Peugeot 50x Series discussion
Two steps forward, one step back, but lots of learning today: Remove two 16mm bolts from engine mount base. Remove two 13mm bolts connecting rubber engine mount to aluminum bracket on the engine. Remove the 16mm nut holding the engine mount to the base. Jack up the engine until you can twist the mount and base out of the car. Remove two 6mm hex bolts from turbo oil return (the ones pointing downwards) and loosen the clamps on the oil return hose. Remove three 13mm bolts from engine mount bracket. The turbo oil return will come with it. You can now access the bolts for the actuator and remove/replace it. It took me some trial and error to reach this procedure, but once you know what to do, it's pretty easy. Unfortunately, the actuator that Brian had was for a much lower pressure, and the thread on the rod is different, so I was not able to install it (maybe it's for a diesel?). I did bolt the modified bracket back in place, hoping that I can source a more suitable actuator and install it without going to such lengths as I did today. Even if I have to do it all again,I'd wager that the first time took at least twice as long as the second time will. Nobody seems to have a recommendation for a source for an actuator, but I have found these: MambaTek Merkur Depot ATP Turbo The second link has a video showing drilling out the spot welds on the OEM bracket and drilling mounting holes. None of these is cheap, and there are more economical options out there, but the first is actually a piston-type, with replaceable o-rings (I think), instead of a diaphragm. Other than cost, my main concern is the size, as if they're too big, they won't fit. Any thoughts out there? Tom -
505 Turbo - won't exceed 2750-3000 RPM
trymes replied to trymes's topic in Peugeot 50x Series discussion
Another update: I picked up an actuator from Brian Holm yesterday that was classified as "rebuilt". Brian had remarked that it didn't have evidence of having been opened to replace the rubber, but it looks obvious to me that what was done was to remove the bracket from the old actuator and drill it to accept the universal actuators with two threaded studs on them (as I pondered earlier in this thread). The good news here is that I am pretty certain that this modification will make it far simpler to replace in the future. Time will tell. -
505 Turbo - won't exceed 2750-3000 RPM
trymes replied to trymes's topic in Peugeot 50x Series discussion
Oh, I also removed the actuator rod and moved the wastegate around. It moves freely, but the actuator has a significant amount of spring pressure. For anyone searching the archives, remove the clip and the rod before trying to confirm that the wastegate is not seized. I also did my best to reach into the inlet of the turbo and I did not feel any movement other than spinning (nothing fore and aft nor any wobbling). -
505 Turbo - won't exceed 2750-3000 RPM
trymes replied to trymes's topic in Peugeot 50x Series discussion
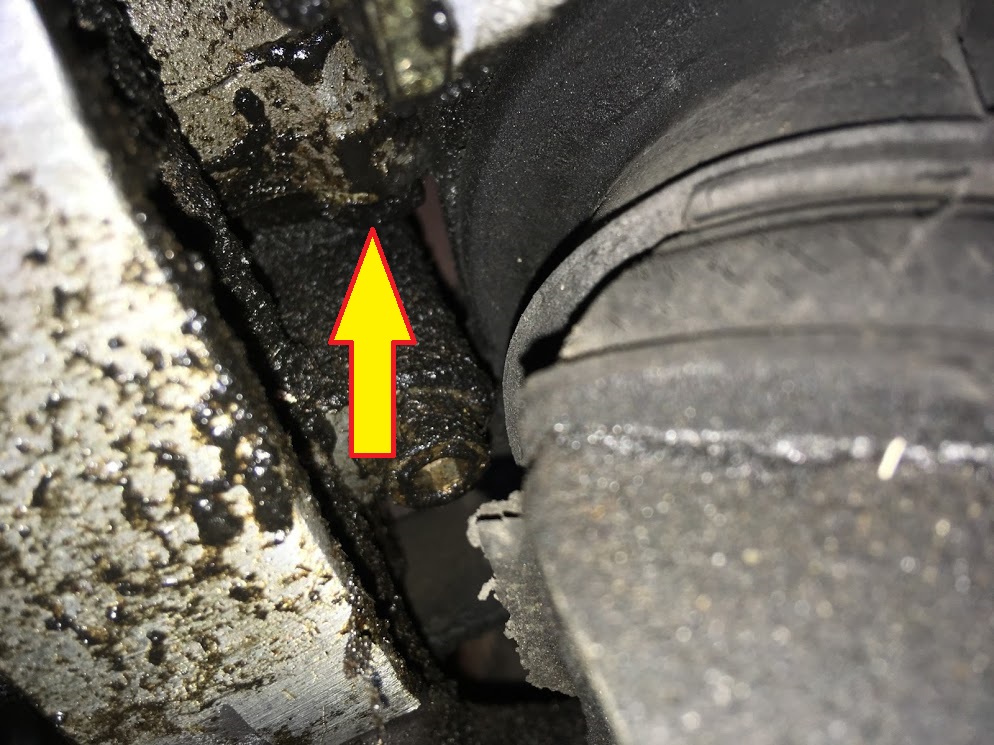
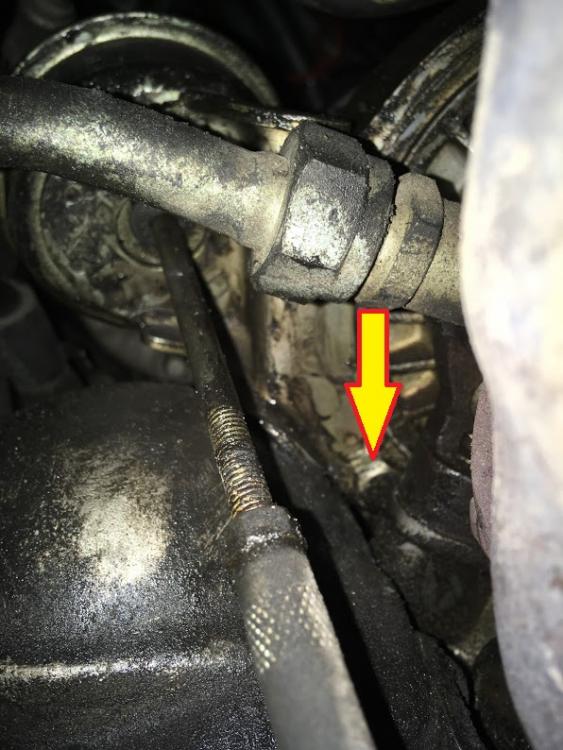
Thanks for that clarification, Bill. I was looking for that detail, though I am not looking forward to the task.However, in the spirit of eternal optimism, I will ask some more questions below to confirm that. Rabin: Is there a way to check the lateral play without removing the turbo from the car? By lateral play, you mean fore and aft when it is in the car, right? Also, an update, as I finally got my hands on the car again today. My car seems to have the wastegate on the right that you can see in this photo from this thread. What this means is that the bolts for the actuator are in the middle and towards the bottom of the turbo, not in the middle and towards the top. Here are three photos showing the bolts from the rear and from underneath. Call me crazy, but the top bolt on the actuator it looks relatively easy to remove, and it seems that I could remove the oil return line from the bottom of the turbo and access that bolt, then replace the actuator, replace the oil return (with a new gasket), and Robert is your father's brother. This leads to more than one question: Is the actuator I have the same as others have encountered? Is there any reason why removing the turbo oil return would be inadvisable? I presume that will have to come off if I remove the turbo, anyway, so what's the harm in trying? I presume that the wastegate itself has a spring on it, so it shouldn't flop around. Am I wrong about that? Still, though, it ought to move reasonably easily, no? Once I give up on the dream of not removing the turbo, what is the easiest way to get it out? I pulled the heat shield from the manifold and if the manifold is going to have to come out, anyway, then pulling it from the top sure looks easier than pulling it from below, even with a lift. Can anyone confirm? Many thanks, Tom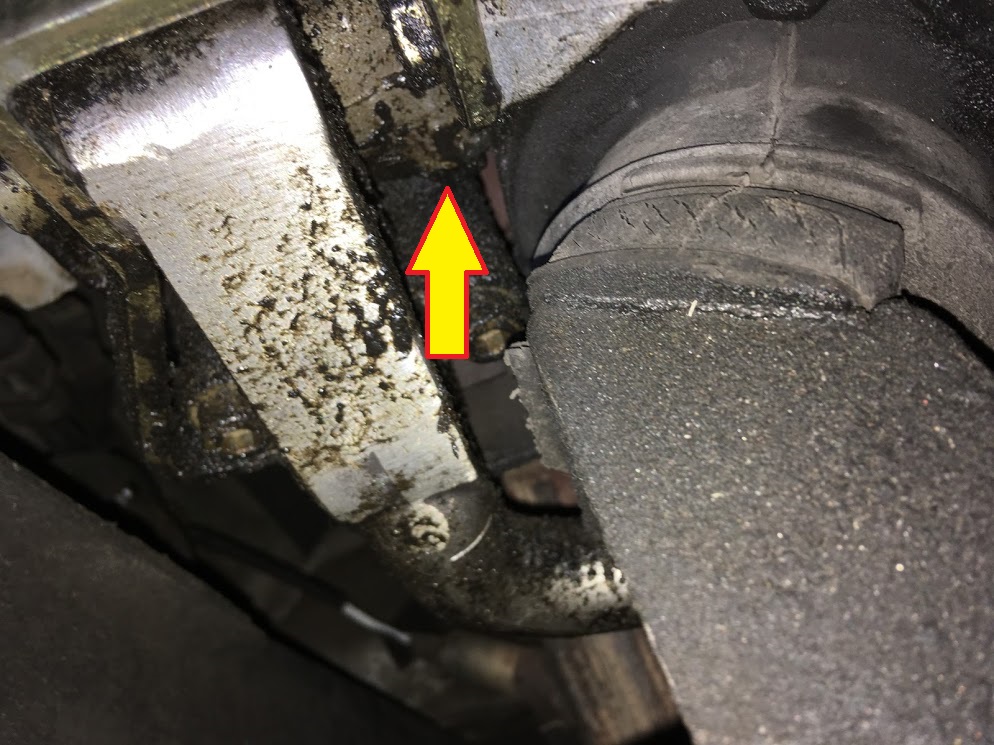
-
505 Turbo - won't exceed 2750-3000 RPM
trymes replied to trymes's topic in Peugeot 50x Series discussion
Not even with four universal joints on the socket?! I wish it weren't so. Once I have the turbo in hand, what is the torque setting for the bolts? Any special precautions or tips? How about checking the wastegate to make sure it isn't stuck? Just disconnect the rod and throw some channnel-loks on it? How much force should be required to move it? I'll be able to get my hands back on the car on Friday if all goes to plan. Tom -
505 Turbo - won't exceed 2750-3000 RPM
trymes replied to trymes's topic in Peugeot 50x Series discussion
Ok, so my apologies for posting 500 replies to this thread, but I have some time to kill and I'm spitballing this stuff. From the pictures in the thread above, it looks like one of the actuator bolts may be accessible from below the car, while the other is accessible from above, perhaps after you have removed the pipe connecting the outlet and the intercooler, and maybe the exhaust heat shield. Are there any tricks to removing these two items? -
505 Turbo - won't exceed 2750-3000 RPM
trymes replied to trymes's topic in Peugeot 50x Series discussion
Thanks, Rabin. Brian Holm is confirming, but he thinks he still has one rebuilt unit. My current plan is to grab that and install it, along with the front rotors and pads, sway bar bushings, etc. From there I can get a feel for how she runs. I was thinking that one of the off-the-shelf actuators (like the ones HERE) I see out there ought to be something that could bolt right on, but that sort of thinking is dangerous. Something like the adjustable bracket found here might be workable, too. Most generic actuators seem to have two bolts on the body of the canister, and perhaps drilling out the spot-welds on the Peugeot bracket to remove the actuator and drilling holes would allow mounting of a generic actuator. Time will tell, as Brian now has me properly terrified that the head is cracked, the ring-lands of the pistons are shot, and so-on, due to overboost. On the plus side, the car now has me interested in pursuing the V6 car a fellow has in Maine for use as a winter car - I need to have my head examined. -
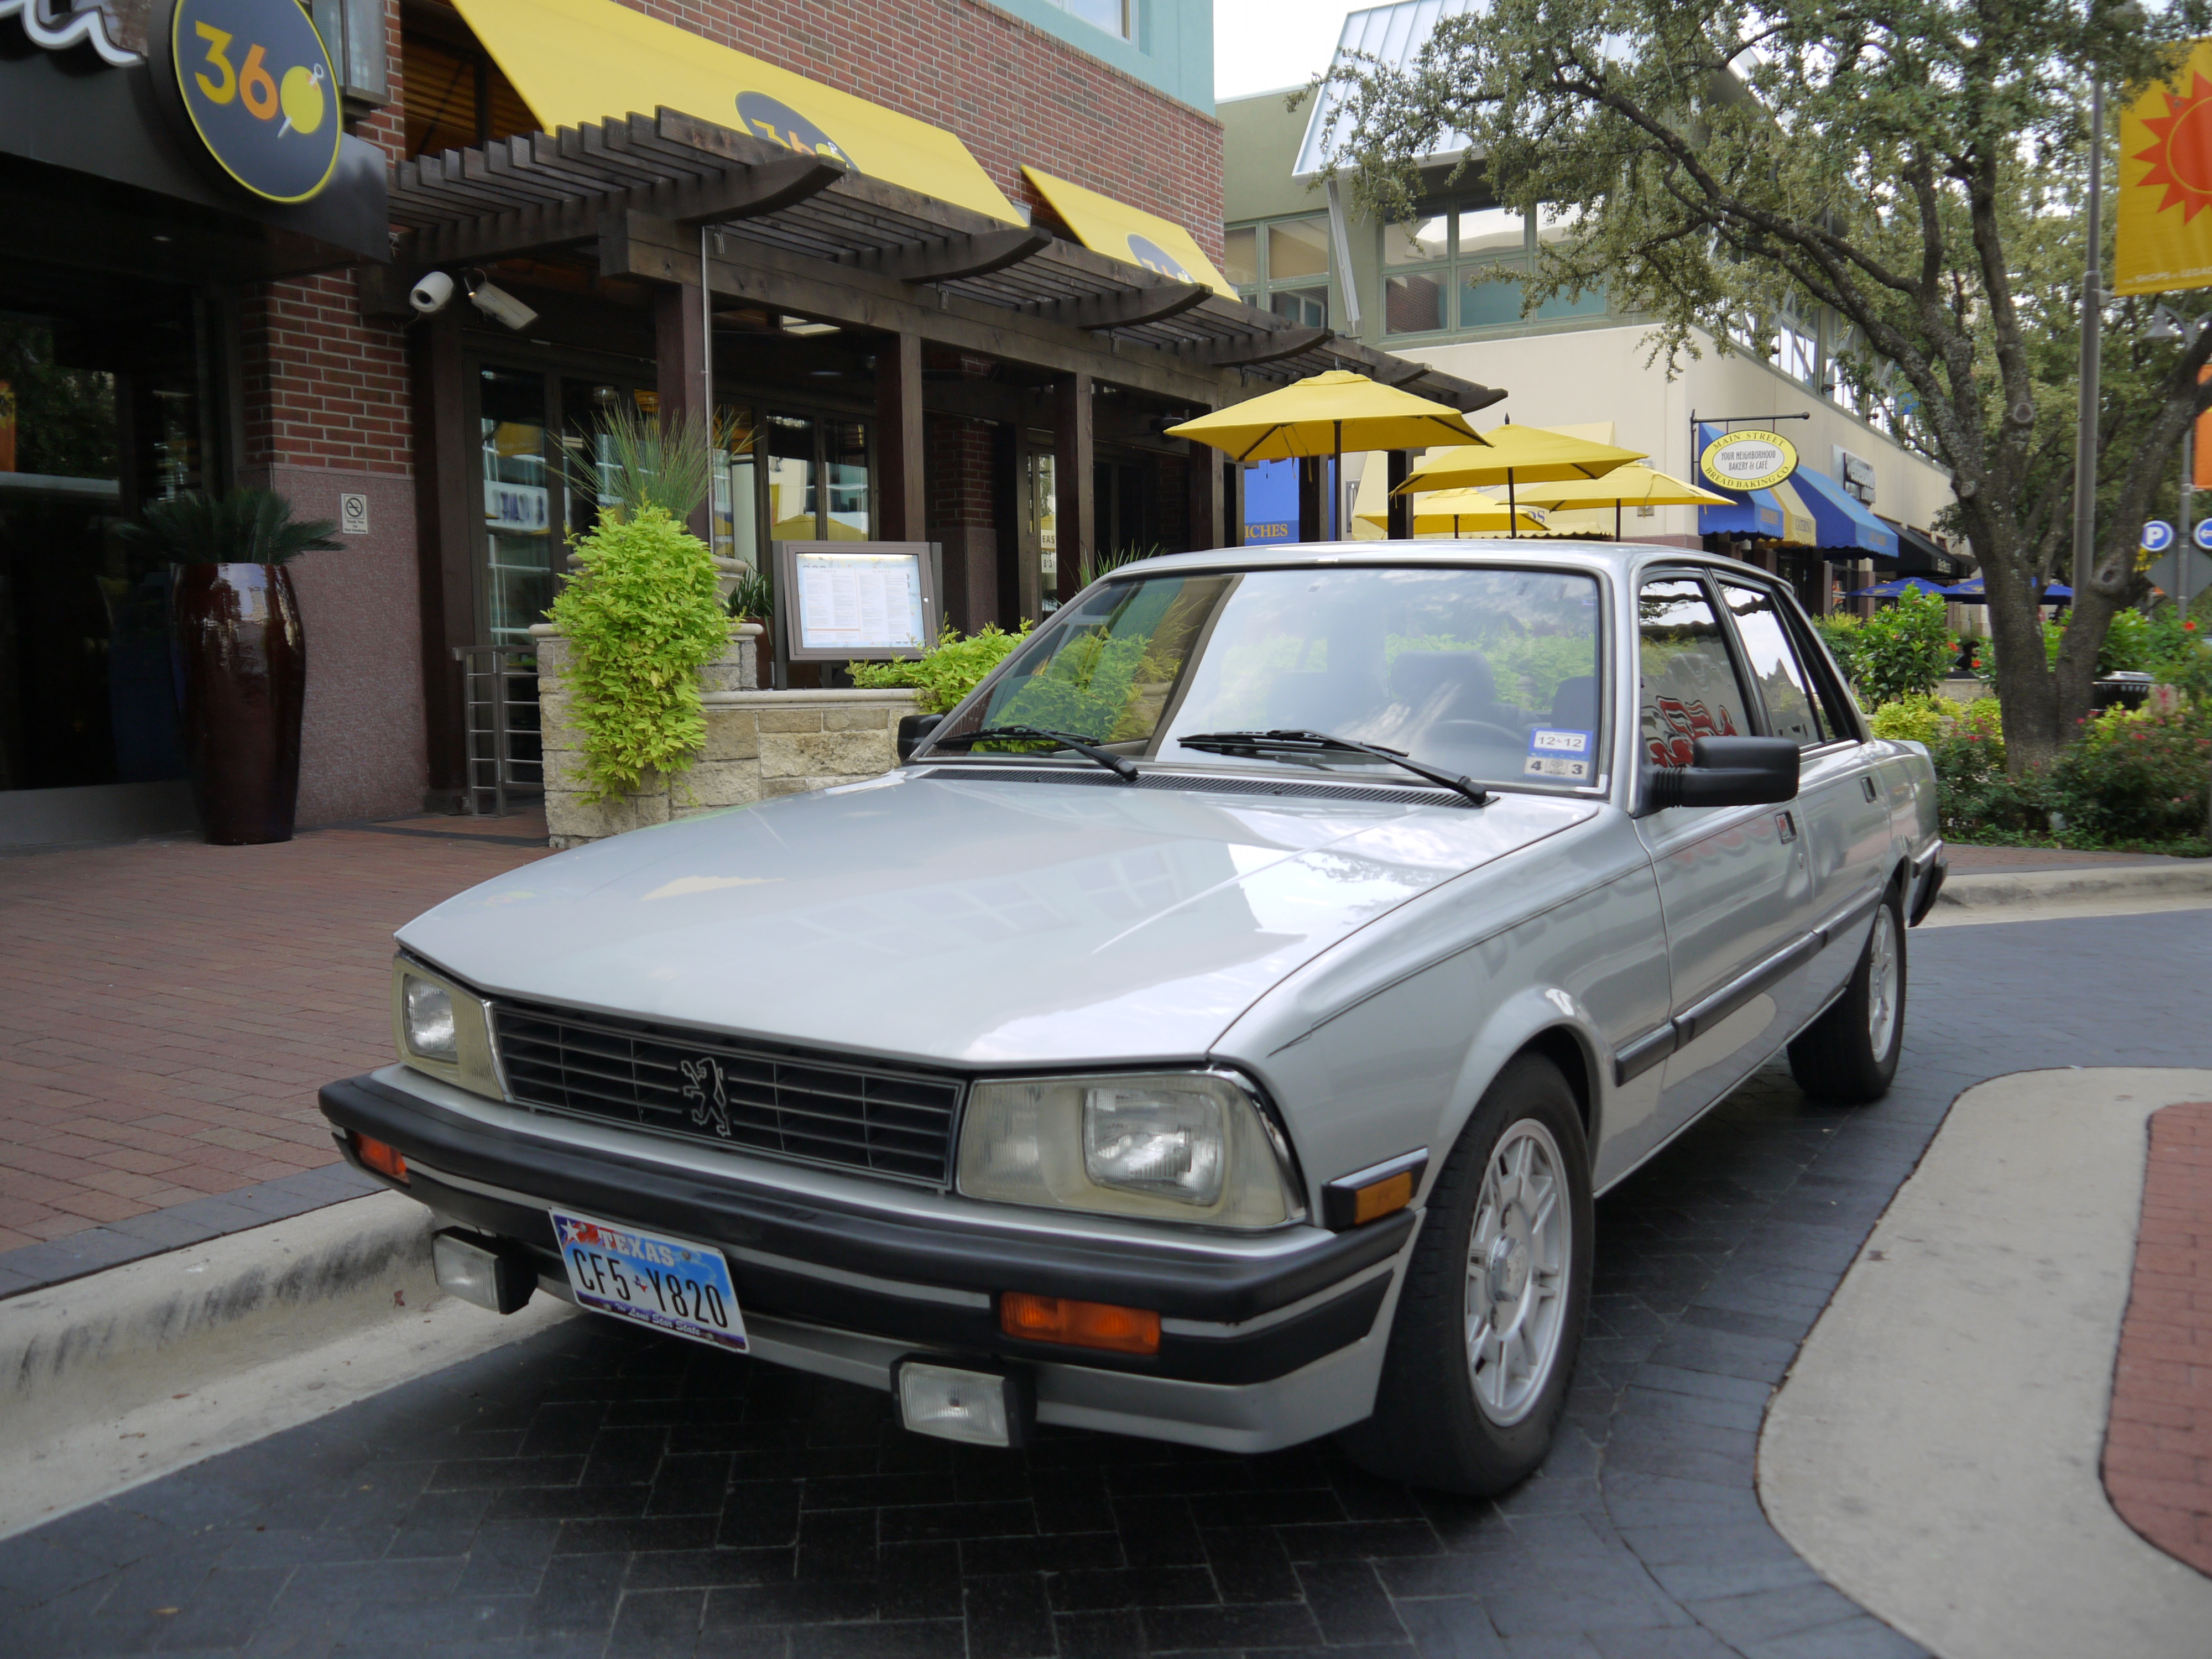
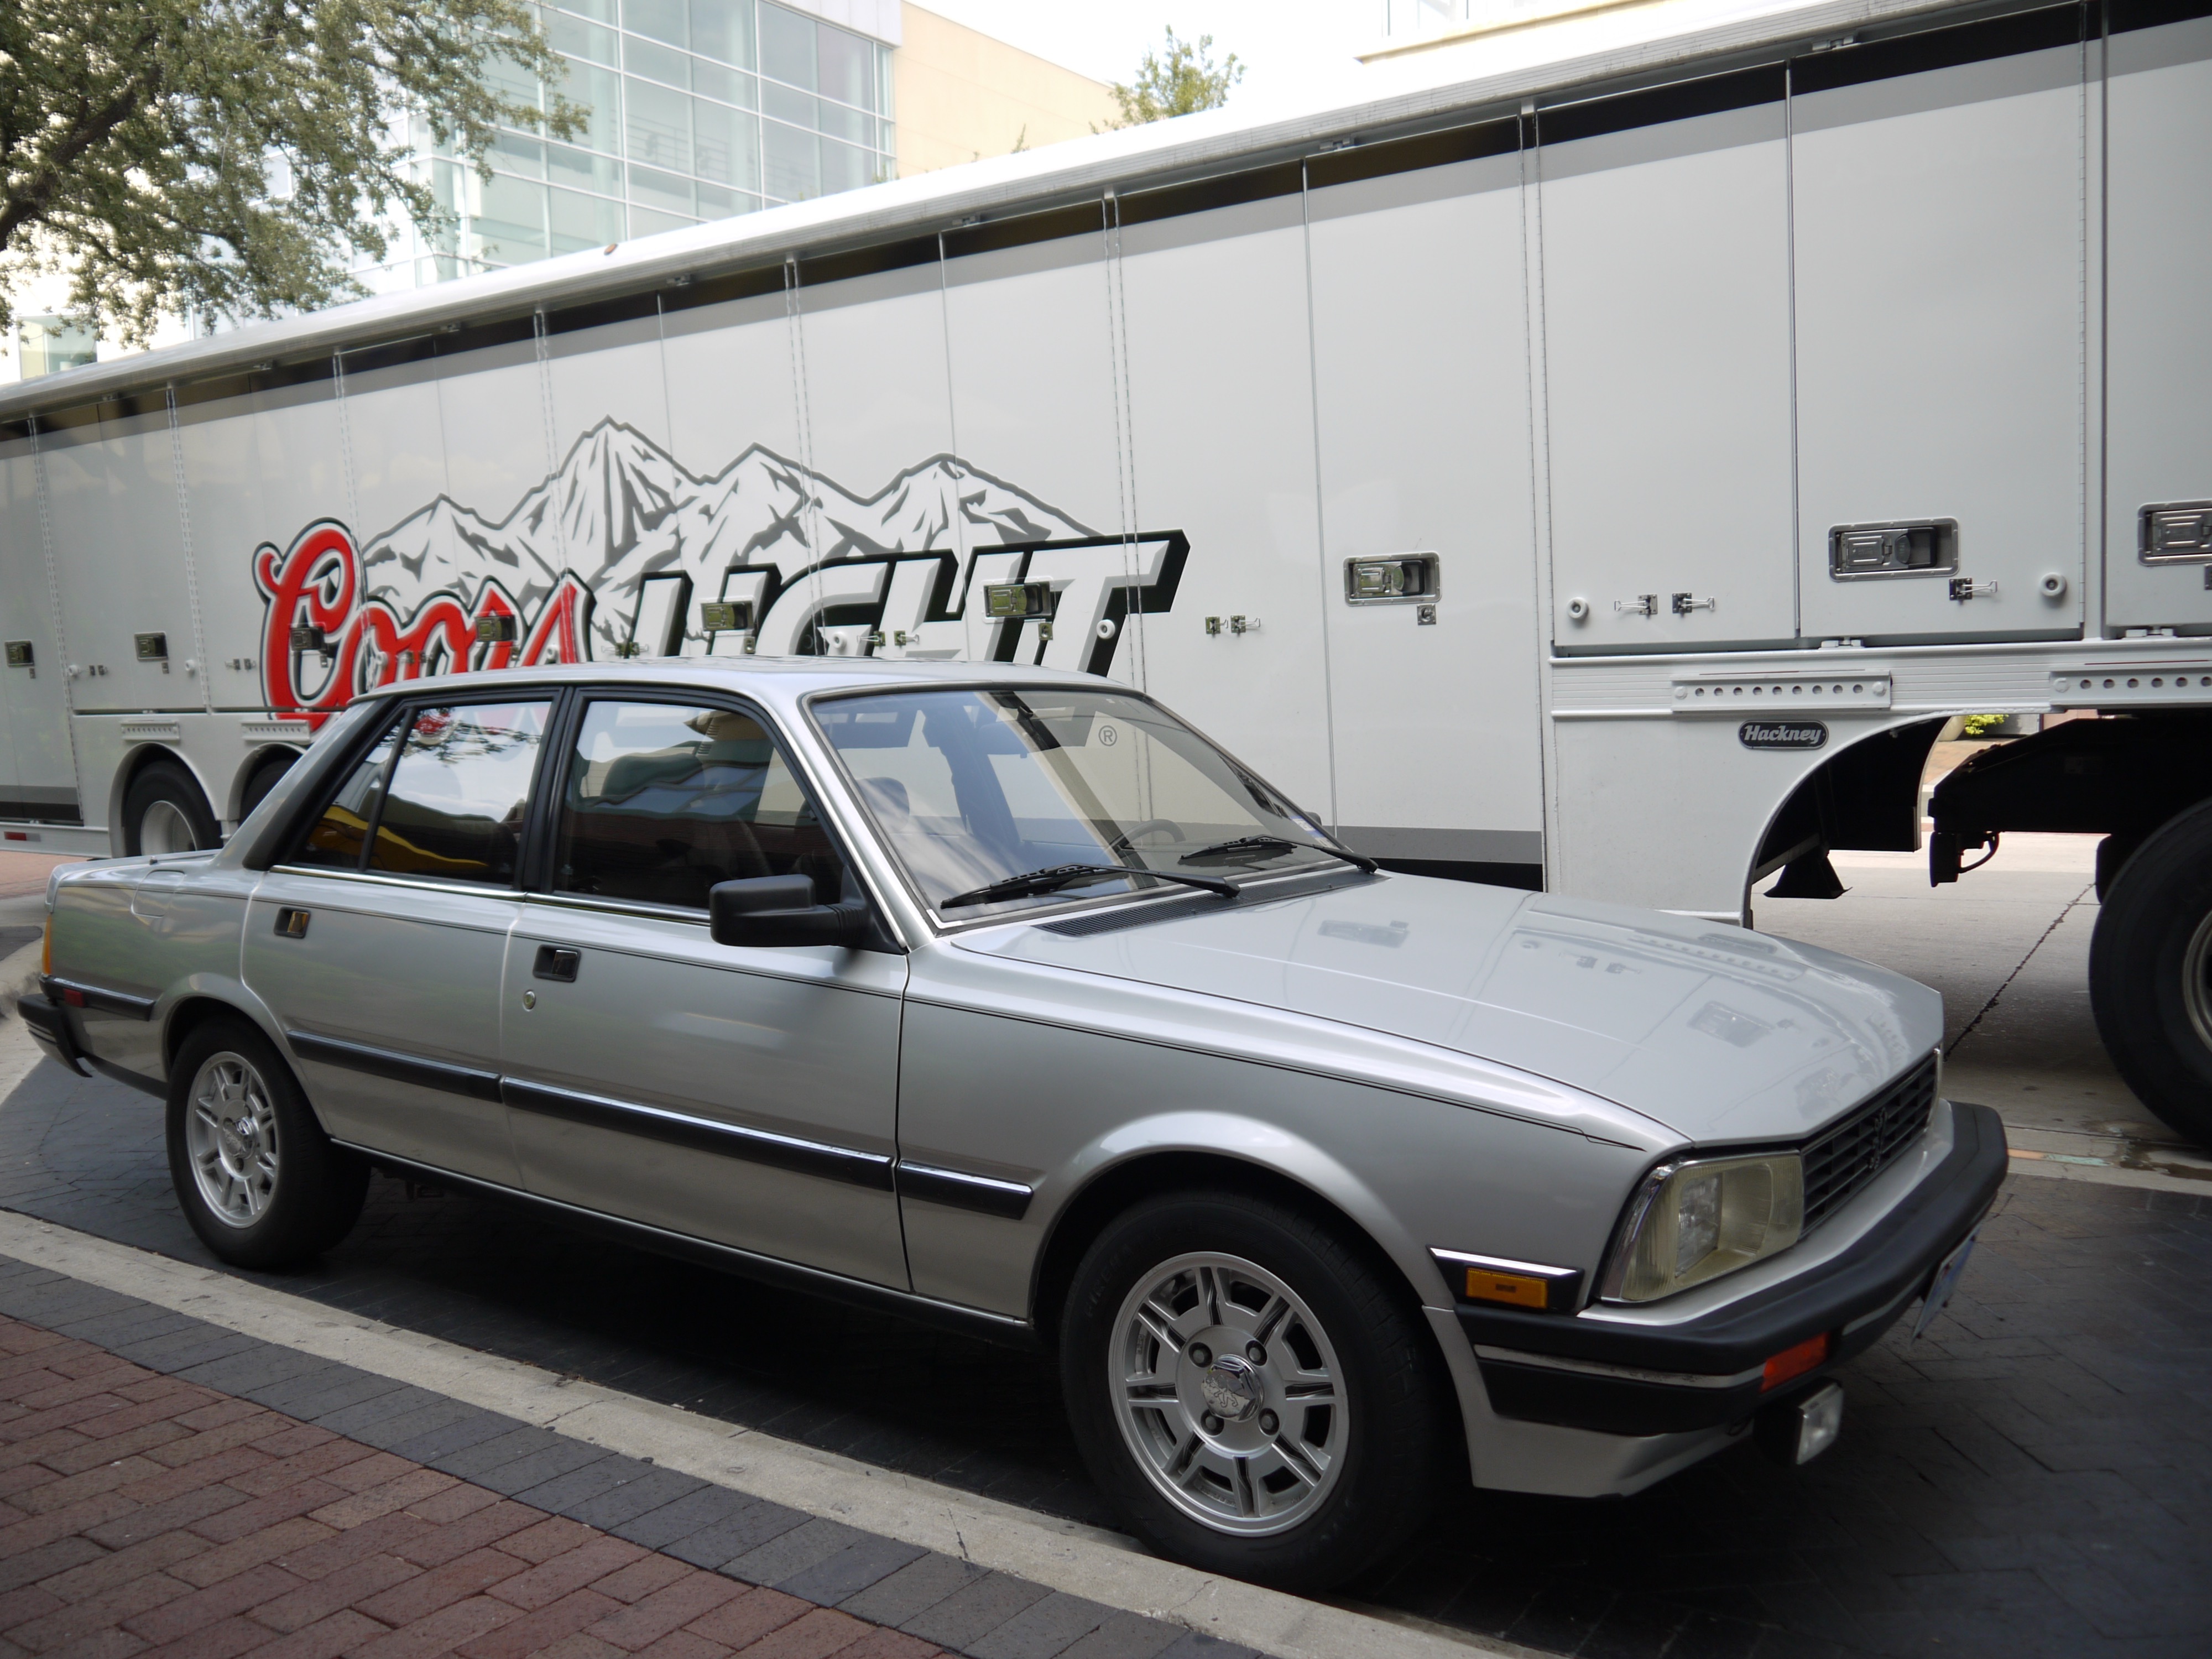
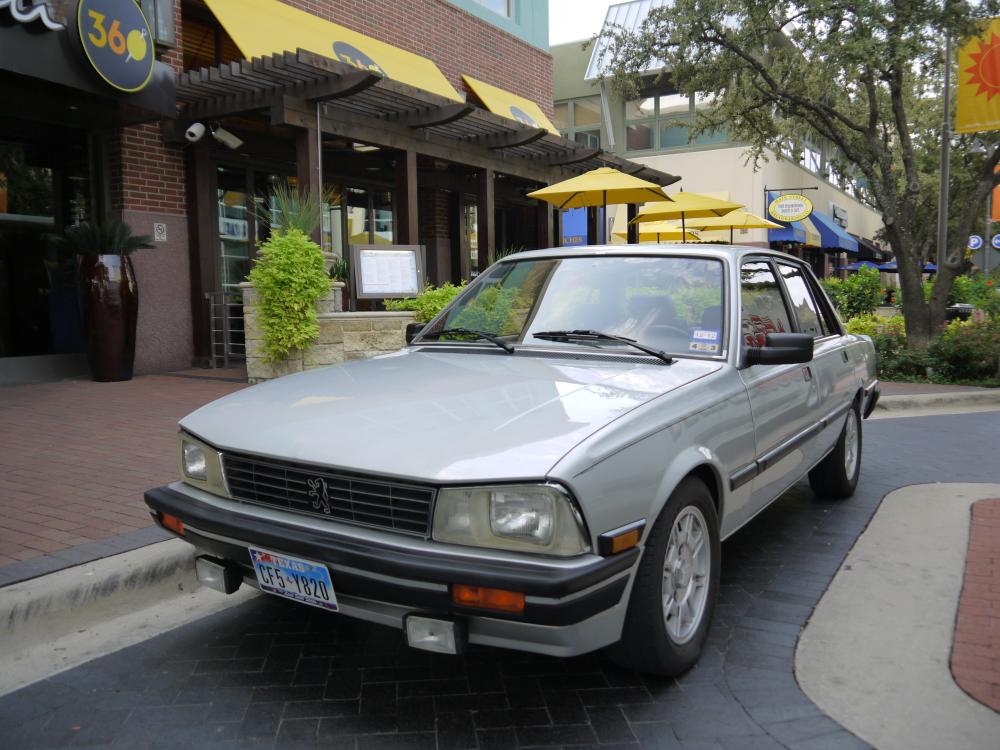
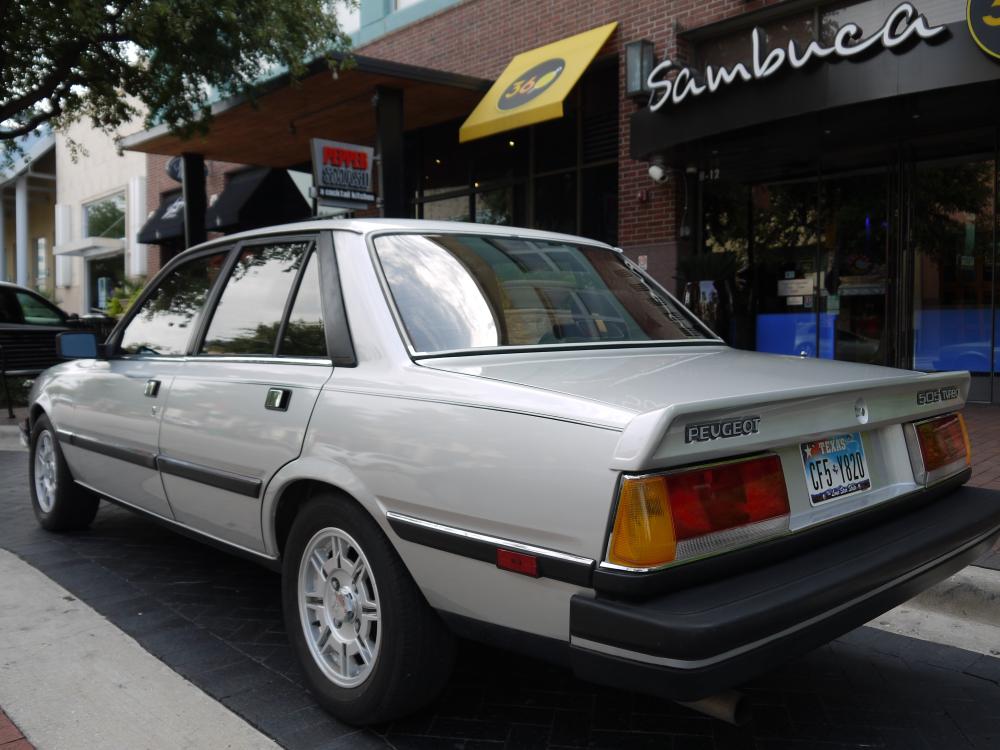
Thank you. It isn't the original paint, but you can see in the interior that it has somehow managed to escape the Texas sun mostly unscathed.
-
Well, as anyone who has seen my other thread on my bad turbo wastegate actuator knows, I have recently joined the 505 community with the purchase of a 1986 Turbo sedan. Other than the (very unfortunate) actuator problem, it's quite a nice car, though showing some deferred maintenance issues and other old-car stuff. This was user M. Davis' car from new, and he had it up in the classifieds section in case you are wondering where you have seen these pictures before. I've got it going and roadworthy again with a new master cylinder (installed in the parking lot of the Hilton Garden Inn!), and I'm building a punch list. Any input on the relative scarcity of the parts I need would be appreciated: Instrument lights (STOP, etc) are not lighting when I turn the key on. Bad grounds or bad bulbs? Leakage at RR of differential on CV joint boot. The aforementioned wastegate actuator that does not. - I sourced and Installed a Mamba universal actuator, but something is still off. I have sent my actuator off to GB Remanufacturing in Long Beach, CA to have it rebuilt. Hope to have it back soon and install. The hood safety catch is in the trunk. If you install it, it makes it impossible to open the hood without something to pry it out of the way. Electric Mirrors are inoperative. Rear windows are slow to lift. (Getting better with time, but the switch for the left rear is intermittent). Need to lubricate the sunroof. The Charge light (battery icon) glows dimly when the lights are on and I press the brakes (bad grounds?). The Battery hold-down is AWOL. - Found a part from Rob Courter @ Javel in Dallas. Part #5615.21. Need to install, still. Fuel Gauge Sender/Sensor was bad, the traces on the resistor board lifted and got tangled up in the float. I managed to source one from Brian Holm, but I am guessing that it might need to come out again to have the contacts cleaned. Noticed a loose wire under the transmission, looks like it might have been attached to what looks like a sensor in front of the pan that someone has stuffed some Silicone in. It drives fine for now, so hopefully it's not urgent. - Identified this as Part #1131.11 "Switch, N9T transmission temperature" that will light an orange light above the fuel gauge if the transmission fluid overheats. Ordered one up from Rob Courter in Dallas, installed 7/11/2018. The oil dipstick has lost its head. - Sourced 405 8v replacement - Marks are higher than on 505 dipstick, but it will do. Front Sway Bar bushings are completely gone (literally not there). - Replaced 8/27/2017 Crushed and broken elbow connecting intake to turbo. - Installed modified Diesel Accordion hose, need to adjust valve cover breather and charcoal canister connections. Had to take it back out and apply some shoe goo after it split in one spot. Coolant needs a flush. - Completed 8/30/2107 Needs front brake pads and rotors, plus rear pads and four flex lines. - Parts sourced from Brian Holm and installed. Needs a new rubber hose to connect the intercooler and intake. - Fixed. Sourced one from a fellow selling a station wagon in Portland, ME. Steering rack boots are only about 40% still there and the bushings in the "power arm" (?) are shot. - Sourced parts from Bian Holm. Fixed June 2018. In general, the car is very attractive and in good condition. I'm hoping that there is a reasonably easy way to replace the wastegate actuator, though I'm guessing that there isn't . Please let me know your thoughts on the relative ease/difficulty of sourcing the parts needed for the above list. EDIT: See my other threads about the car not exceeding 3000 RPM for what is required to remove the actuator (spoiler alert: you need to remove the RH motor mount, but not the turbo or exhaust manifold).

-
505 Turbo - won't exceed 2750-3000 RPM
trymes replied to trymes's topic in Peugeot 50x Series discussion
So, I had the car up on a lift for something else and I got a better look at the actuator and how it is mounted to the turbo. It looks like one of the bolts is readily accessible, but the second one, if removable, would require three to four socket U-joints and a healthy supply of salty language to get out. If anyone has experience with this, please do chime in.