Wales Posted April 23, 2019 Author Report Share Posted April 23, 2019 Last weekend I fitted the oil filter re-location flange and had a first look at the new clutch release bearing. I need to change the bearing, since the clutch is meant for 50 mm OD bearing and the stock is 45 mm. I tested it with the old one, but it will cause problems since the clutch “nails” are too short for it, i.e. the clutch bearing could get stuck. I also managed to continue the oil sump. It is almost ready, I just need to test fit it to the engine with the dry sump pump to ensure the proper lining of the pump. Then I need to TIG weld the rest of the seams of the sump from the inside also. Then I’ll make the suction points for the scavenge and cut out the excessive parts off the dry sump pump fitting plate. I’ll try to work out the summary next, I think I did overthink it too much... -Wales Quote Link to comment Share on other sites More sharing options...
Bean Posted April 24, 2019 Report Share Posted April 24, 2019 Coming along very well Wales - Oil pan looks great! Is the welding still being done with your mig? Just occurred to me that the shift fork might also need some beefing up as the new clutch likely has a much higher clamping force and may stress it some more. I've seen and heard the shift fork arm cracking - but shouldn't be too hard to reinforce. Rabin Quote Link to comment Share on other sites More sharing options...
Wales Posted April 28, 2019 Author Report Share Posted April 28, 2019 On 4/24/2019 at 9:02 PM, Bean said: Coming along very well Wales - Oil pan looks great! Is the welding still being done with your mig? Just occurred to me that the shift fork might also need some beefing up as the new clutch likely has a much higher clamping force and may stress it some more. I've seen and heard the shift fork arm cracking - but shouldn't be too hard to reinforce. Rabin I welded the rest of the outside seams and all of the inside seams of the oilpan with a TIG to ensure the sealing. I only welded the outside of the flange with a MIG on the oil pan. Any idea of the stock clutch release load? As for the TTV one they say it is 275 kg for the 50 mm release bearing. -Wales Quote Link to comment Share on other sites More sharing options...
Wales Posted April 28, 2019 Author Report Share Posted April 28, 2019 I intended to make this summary to conclude all of the future plans also, but they are pretty much open at the moment, so I’ll just add the things I have done so far and the parts I have already acquired. Engine: Head serviced, port imperfections removed, flow benched, otherwise stock Engine head gasket: Elring MLS Engine head bolts: ARP head stud kit Pistons: Forged Wösnerr Low-Compression (8:1) Connecting rods: Forged H-Profile PEC Connecting rod bolts: ARP 2000 Connecting rod bearings: King Racing Main bearings: King std Thrust bearings: Glyco std Gaskets: Elring TTV Racing Billet auxiliary pulley PACE CD2000 Dry sump oil pump DIY oil sump with support for dry-sump oil pump DIY oil filter relocation flange DIY bracket for auxiliary devices Fuel and ignition system: Fuel tank: JAZ 45 l (12gal) safety tank with fuel level sensor and safety foam Fuel pump: 2 x Bosch “044” Fuel lines: Stainless steel AN8 Hardlines with Teflon/Stainless AN8 braided hoses Fuel line fitting: Aeroflow AN8 “Full-Flow” Injectors: Bosch EV14 1100cc Ignition: Stock Coil-on-plug O2: PLX DM-6 with Bosch LSU 4.9 sensor ECU: Megasquirt II with full sequential mod Body: Excessive rust repairs in the rear half of the car Fuel tank lid welded shut Sunroof welded shut Drivetrain: DIY clutch bellhousing with crankshaft position sensor insert TTV Racing Custom lightened flywheel TTV Racing Clutch cover TTV Racing Paddle clutch disc Propeller shaft housing sand blasted and painted Chassis: Rear subframe, rear trailing arms and suspension support sand blasted and painted Some of the upcoming things: 3,5” Downpipe 3” Exhaust DIY Exhaust manifold DIY Intake manifold Rollcage Carbon fiber hood Adjustable coil-over suspension Big brake kit Running on E85 Cooling system upgrade Some of the planned things: Garrett GTX3076R Gen2 505 Super production styled body kit -Wales Quote Link to comment Share on other sites More sharing options...
SRDT Posted April 29, 2019 Report Share Posted April 29, 2019 22 hours ago, Wales said: Any idea of the stock clutch release load? As for the TTV one they say it is 275 kg for the 50 mm release bearing. I think it's 5250 N or 535 kg with the pull type clutch, best stock 215mm clutch for a BE gearbox ; you can go up to 228mm but then the flywheel is a bit tricky. Quote Link to comment Share on other sites More sharing options...
Bean Posted April 29, 2019 Report Share Posted April 29, 2019 This is the BA10/5 clutch fork that would need to cope with the 275 KG load of the pressure plate. Any chance you have stock BA10/5 pressure plate specs? I checked SPEC clutches to see if they listed pressure plate force, but nothing listed / found. Rabin Quote Link to comment Share on other sites More sharing options...
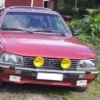
Wales Posted April 29, 2019 Author Report Share Posted April 29, 2019 Yes, thanks for clarifying it Rabin. SRDT, are you sure that 535kg is the release load, since half a ton sound a bit high for stock clutch? I know that pull type can handle the torque better but it shouldn't add the release load too much? Oilpan is almost finished: Dont mind the condition of the body too much, since it is going under work after I have finished the oilpan and the engine mounts.. Like I mentioned in the 2018 post the rear of the car has already been trated excluding the differential and the drive shafts: Oh yea, and there are threaded bars instead of the rear suspension, for finding the proper ride height.. I'll add more pictures from the rear of the car after I have cleaned it a bit, so dusty right now.. -Wales Quote Link to comment Share on other sites More sharing options...
SRDT Posted April 29, 2019 Report Share Posted April 29, 2019 It may be 535kg on the disc and not on the bearing, I'm not sure how Peugeot is measuring this. Quote Link to comment Share on other sites More sharing options...
Alfanatiker Posted May 19, 2019 Report Share Posted May 19, 2019 On 4/29/2019 at 8:42 PM, SRDT said: I think it's 5250 N or 535 kg with the pull type clutch, best stock 215mm clutch for a BE gearbox ; you can go up to 228mm but then the flywheel is a bit tricky. Flywheel and clutch on my turbo is 235mm. Is the older ones 215 like the NA-cars? Quote Link to comment Share on other sites More sharing options...
Wales Posted March 9, 2020 Author Report Share Posted March 9, 2020 Its been almost a year now since the last update.. The project still lives though, but I find it hard to focus to just one project at a time. Last summer went nicely when tuning an stock Yamaha outboard motor with porting and fabricating an exhaust system that utilizes expansion chambers. And ofcourse this wasnt enough I also found a 15' race cat boat that needed some repairs. Anyway, for the 2019 I didn't get much more done than what is already documented here. For the 2020 I will try to make as much as I can, and I also changed my plans for a bit. The plan now is to keep the body and the frame almost as stock as possible, except the rollcage and stripped interior. My aim is to get the car driveable as soon as possible so I could get some feeling and data about how all the custom made components work and which ones need modification. I also changed my plans regarding the E85 since it wont work well with such low compression ratio that Wösnerr pistons give (7.8:1 measured). So I decided to build it as much E85 ready as possible, but first for the gasoline as a fuel. I changed the turbo aswell to something much cheaper and the one that supports way more boost that GTX3076R at the expense of weight and response. It is now Holset HX40 Super, that I already bought. With the price difference between these two I could get all the missing components to get the engine in working condition. Here the turbo: And here is a quick drawing about how the exhaust manifold could look like, as the HX40 Super did come with divided T3 flange: As for the progress itself, it helped alot when my friend bought a 306 XSi for spare parts car and I did get to buy the engine from it. So now I could use the 306 block as a mockup and I managed to fabricate the lower engine mounts last weekend: And yes, I also hate the fact that I have not yet taken care of the rustiness and messiness on the engine compartment, but doing so requires atleast a full weekend to car to be indoors and there cant be any dust sensitive work going on at the same time. But it will be taken care of in the very near future, I really do hope so.. Next on the list is the clutch mechanism, I have a pretty good idea how to make it work, well see next weekend how it turns out. -Wales On 5/19/2019 at 8:58 PM, Alfanatiker said: Flywheel and clutch on my turbo is 235mm. Is the older ones 215 like the NA-cars? I think all the Turbo models have the 235 mm one, and the 215 mm that was mentioned here were referring to the one that this engine (XU10J4RS) had originally as usually it is paired with BE3 gearbox. Quote Link to comment Share on other sites More sharing options...
Bean Posted March 9, 2020 Report Share Posted March 9, 2020 That motor is truly tiny compared to the N9TE turbo gas motors these came with - So seeing it with that HX-40 monster should be impressive! I'll be curious how it spools that turbo. Thanks for the update as well! Hopefully have some nice updates for my cars coming soon as well. Rabin Quote Link to comment Share on other sites More sharing options...
V-M Posted March 10, 2020 Report Share Posted March 10, 2020 Original clutch disk is 228mm but fly wheel and plate was 235mm Quote Link to comment Share on other sites More sharing options...
my3AWDgst Posted March 10, 2020 Report Share Posted March 10, 2020 Nice work! Keep it up Quote Link to comment Share on other sites More sharing options...
Alfanatiker Posted March 13, 2020 Report Share Posted March 13, 2020 You will still get a good engine with E85 at that compression. And you can of course have a higher boost pressure and more ignition advance. Also you will probably get faster spool with E85, as there is more volume of gasses exiting the engine and in to the turbo. AND it will run a lot cooler. If you have easy access of E85, I would still use it. I have switched a lot back and fourth from and to E85 over the years (I´ve build many engines, and here in Norway we dont get E85 anymore, and when we did it was rare). E85 engines kind of feels a lot less responsive, but give more power and torque and spools the turbo faster and earlier in the rpm range. Petrol builds have with no doubt much better throttle response , but less hp, torque and higher temperatures. Quote Link to comment Share on other sites More sharing options...
Wales Posted November 18, 2020 Author Report Share Posted November 18, 2020 On 3/13/2020 at 11:40 AM, Alfanatiker said: You will still get a good engine with E85 at that compression. And you can of course have a higher boost pressure and more ignition advance. Also you will probably get faster spool with E85, as there is more volume of gasses exiting the engine and in to the turbo. AND it will run a lot cooler. If you have easy access of E85, I would still use it. I have switched a lot back and fourth from and to E85 over the years (I´ve build many engines, and here in Norway we dont get E85 anymore, and when we did it was rare). E85 engines kind of feels a lot less responsive, but give more power and torque and spools the turbo faster and earlier in the rpm range. Petrol builds have with no doubt much better throttle response , but less hp, torque and higher temperatures. I might try E85 once I get her running. E85 is quite readily available here in Finland, and it is pretty cheap too. When changing from gasoline to E85 I only need to get rid of the safety foam in the JAZ safety tank, as it is not resistant to E85. And of course I would need new map for the ECU also. Last time I forgot to mention that I bought an Mishimoto Intercooler and 25-row Oilcooler for this thing. Below is also a picture about what the car should look like from the front when it is finished. In March, I was pretty upset to watch those last progress pictures as the enginebay was really dirty and rusty. I finally decided to do something about it and took all the parts off, old paint off, fixed all the rusted areas and lastly painted it. I was very pleased about the paint and the surface quality as it was our first major paintwork that we have done. I cant't wait to have the rest of the car painted with the same colour. In the summertime all my freetime seems to go with powerboating. As the winter is arriving again, I will have more time for the project. I managed to change all the steering components to new ones and at the moment I am working on painting the subframe, trailing arms, suspension components and brake components. The front suspension "bodies" were rusted beyond repair since they were in 2 pieces rusted apart. Luckily I found 2 more 505's for spare parts and they were really affordable. I got the bodies from them and then took all the previously listed parts to have them sandblasted. I should be able to paint and install them in the upcoming weeks. After that I think I need to start working on the underside of the car and make the rollcage in the same time as it requires holes to be drilled in the floor. By the way, there was an discount on AN hoses and fittings, so I bought somewhat all the hoses and fittings I still require for the project. Oh and I try to keep you updated more frequently. It also helps to keep me motivated, althought I am really set for this to be road-driveable in the next summer. -Wales Quote Link to comment Share on other sites More sharing options...
Bean Posted November 18, 2020 Report Share Posted November 18, 2020 Thanks for the update Wales! Is the paint a plain black? Looks great... Rabin Quote Link to comment Share on other sites More sharing options...
Wales Posted November 19, 2020 Author Report Share Posted November 19, 2020 21 hours ago, Bean said: Thanks for the update Wales! Is the paint a plain black? Looks great... Rabin The paint is the 205 noir onyx (P3XY), there is little bit of yellow added to the black in the mix. Quote Link to comment Share on other sites More sharing options...
speaksgeek Posted January 4, 2021 Report Share Posted January 4, 2021 Every time I read through this thread, it inspires me for a similar project. Great work, and keep it coming! Quote Link to comment Share on other sites More sharing options...
Wales Posted January 11, 2021 Author Report Share Posted January 11, 2021 On 1/4/2021 at 8:33 AM, speaksgeek said: Every time I read through this thread, it inspires me for a similar project. Great work, and keep it coming! Thank you, I truly hope that I am able to get the rust repairs done during my winter vacation (January 2021), so that the project phases should become much more interesting. I currently feel that at the moment I am making close to zero progress but there is just so many things yet to figure out and to fix about the car... Anyway I did manage to paint the subframe, trailing arms, suspension components and brake components and install new bushings on the trailing arms: I found certain things to be on sale at black friday, so I bought about 700 m of 0.75-2.5 mm2 cables for the wiring harnesses, 4xEGT sensors and 4-channel ignition module since VTS coils don't have them built-in. I also bought 2 Sparco Circuit seats with TRS 6-point harnesses althought they were not discounted: I also managed to assembly the front suspension with new genuine shock absorbers: Currently I am working on the rust repairs and the rollcage. I was well aware of the problems regarding the bending of the thin-walled tubes with a conventional hydraulic bender, but I hoped that I could overcome them with precisely ground tooling for the 45 mm tube but no, I was not able to achieve sufficient results. The tube roundiness suffers too much, as it is only allowed to deform by 10% and I had 13%. It did also look pretty awful to be honest. So I contacted one of the leading rollcage makers in Finland and asked them to bend me the main arc and both side arcs as they contain somewhat tight bends. I am confident that I am able to do the rest of the bended tubes in the rollcage with the hydraulic bender. So while I am waiting the arcs to be done, I am trying to remove the old anti-stonechip junk from the inside of the wheel arcs. After that I'm going to repair any rusted areas in them and primer them with epoxy and finish them off with new 2k polyurethane anti stonechip paint. Below is one picture about the current state of the interior, pretty sad, huh? I can't wait to have the rollcage installed and interior painted... By the end of this month I am looking forward to: Rollcage finished, or at lest almost All the remaining rust repairs done Front and rear suspension fully assembled Steering installed Enginemount center pieces made from polyurethane Exhaust manifold started Hopefully I am able to update this topic also. Best Regards, Wales Quote Link to comment Share on other sites More sharing options...
Bean Posted January 11, 2021 Report Share Posted January 11, 2021 Great progress! Love the seats you bought as well. Have you ever read up on sand bending pipes? I had buddy’s that built cages years ago with a hydraulic bender and they used to pack the tubes with sand and bend them that way to avoid distortion. Getting a good shop to bend them up is definitely the better option of course, but if you run into a situation where you need to do a one off it might come in handy. Are you doing a chromoly cage or ? As an aside - I finally bought my own mig welder myself. Hopefully this summer/fall I can tackle my own rust repairs! Rabin Quote Link to comment Share on other sites More sharing options...
Mike T Posted January 12, 2021 Report Share Posted January 12, 2021 Sand bending is old school - it used to be done for hydraulic pipes too... but don't forget to clean them out before use! Quote Link to comment Share on other sites More sharing options...
Wales Posted January 12, 2021 Author Report Share Posted January 12, 2021 12 hours ago, Bean said: Great progress! Love the seats you bought as well. Have you ever read up on sand bending pipes? I had buddy’s that built cages years ago with a hydraulic bender and they used to pack the tubes with sand and bend them that way to avoid distortion. Getting a good shop to bend them up is definitely the better option of course, but if you run into a situation where you need to do a one off it might come in handy. Are you doing a chromoly cage or ? As an aside - I finally bought my own mig welder myself. Hopefully this summer/fall I can tackle my own rust repairs! Rabin 3 hours ago, Mike T said: Sand bending is old school - it used to be done for hydraulic pipes too... but don't forget to clean them out before use! Yes I am somewhat famialiar with sand bending, but I have only achieved good quality bends when applying some heat on the tube. But for the rollcage bends, heating is prohibited as stated by the FIA and also by Finnish national motorsport organisation (AKK). I think the main reason for the distortion comes from the reason that the tube doesn't "run" without effort via the opposite tooling, I found 2 little kinks just where these 2 opposite tooling are located. I don't know the real names for these things, but they are not the die with arc, but the opposite. Backside tooling, maybe? I was going to try out the hydraulic bender once more for the over 45 degree bends, as that seemed to be the point that the problems started. But this time, I'm planning on installing some ball- or rollerbearings in the "backside tooling" rollers, have some spring or something like that to pull the tube towards the bend when bending it and also maybe to fill it with sandblasting sand just to be sure. For the future it would be really nice to have a method to do proper tight bends without the expensive machinery or delays caused by the first modelling the tubes and then sending them over to the shop, and then waiting them to arrive via the infamous Finnish postal service. I'm making the cage from seamless cold drawn tube (Precision hydraulic tube) as it is required by the beforesaid organisations, not sure about FIA but AKK at least for the most of the classes. And yet again, I'm not building this project for any specific racing class but I thought the rollcage could be made to fit almost any of the classes with the same effort that it is to do the cage that looks good but doesn't qualify for any of the classes. You could also do it from chromoly, but it is even more expensive and yet more difficult to work with. At this point of the project I feel like everything doesn't necessarily need to be harder than they already are. I am truly hoping to get my rust repairs done so that I could focus on getting the car back to together and maybe drive it someday. Rust repairs are not so bad in general, if you can fix a big area on the same time. Doing little pieces here and there it is just endless jigsaw. But have fun and try to enjoy it -Wales Quote Link to comment Share on other sites More sharing options...
d00zer Posted January 26, 2021 Report Share Posted January 26, 2021 Very interesting thread! Keep up the good work! Quote Link to comment Share on other sites More sharing options...
Bean Posted January 26, 2021 Report Share Posted January 26, 2021 Holy cow @d00zer! You need to update your thread soon - It’s been years! Good to see you back. @Wales - Hopefully your January went as planned. Looking forward to progress. Rabin Quote Link to comment Share on other sites More sharing options...
Wales Posted January 28, 2021 Author Report Share Posted January 28, 2021 On 1/26/2021 at 5:12 PM, d00zer said: Very interesting thread! Keep up the good work! Thank you! I'll try my best. On 1/26/2021 at 5:26 PM, Bean said: Holy cow @d00zer! You need to update your thread soon - It’s been years! Good to see you back. @Wales - Hopefully your January went as planned. Looking forward to progress. Rabin Well not exactly, but I did manage to get some progress. The plan was to: Rollcage finished, or at lest almost <- Started, but lots of work to do. All the remaining rust repairs done <- Only rearwheel arc areas remain along with drivers floor. Front and rear suspension fully assembled <- Front suspension is assembled without the antiroll bars. Steering installed <- Well, steering rack is istalled without powersteering, steering column is attached for measuring purposes. Enginemount center pieces made from polyurethane <- Still on progress, haven't decided final design yet. Exhaust manifold started <- Nope. The plans did change a bit in the process, as I decided to focus first on the frontwheel arcs and remove the old anti-stonechip junk from the inside of the wheel arcs. That took 16 hours alone to do that as some of the areas are really hard to reach and the anti-stonechip is really difficult to remove. After that I fixed the rusted areas in them (6 in total) and then I painted them with epoxyprimer and coated them with U-Pol Raptor protective coating. I also made some room for the side exhaust. And ofcourse, I got the rollcage main arcs from the shop. Infact, the owner of the shop was so kind that we were able to pick the cage parts at 8 pm on Friday evening. So now I'm doing the rollcage. Starting it has also been much more time taking that I was aware of. There are just so many rules and requirements regarding about fabricating one. I would really like to get it right on the first try so it is basicly 10 minutes of doing and 10 minutes reading the rules. I did design the rollcage maindesign about an year or two ago, but the details just comsume time.. Now the location of the main arc is locked and the front arcs also are almost ready, so from now on I think it should get much more faster. I'll try to update this thread as soon as I get more of the rollcage fitted. As you can see, I also removed the wall between the trunk and the passenger compartment. I am planning to move it back so that the rear suspension can be accessed from the passenger compartment and replacing the wall with aluminum frame / carbon fiber sheet. For now, the workorder is somewhat this: Rollcage along with the seat fixings Removing the remaining old anti-stonechip below the passenger compartment Fixing the remaining rusted areas (Front of drivers floor, rearwheel arcs) Painting the car from the inside Painting the car from the outside -Wales Quote Link to comment Share on other sites More sharing options...

Recommended Posts
Join the conversation
You can post now and register later. If you have an account, sign in now to post with your account.